Recovering Accidentally Deleted Files with the testdisk Tool
Note: Stop all read/write operations on the current volume immediately after accidentally deleting files to maximize the chances of data recovery. Copy the /usr
Note: Stop all read/write operations on the current volume immediately after accidentally deleting files to maximize the chances of data recovery.
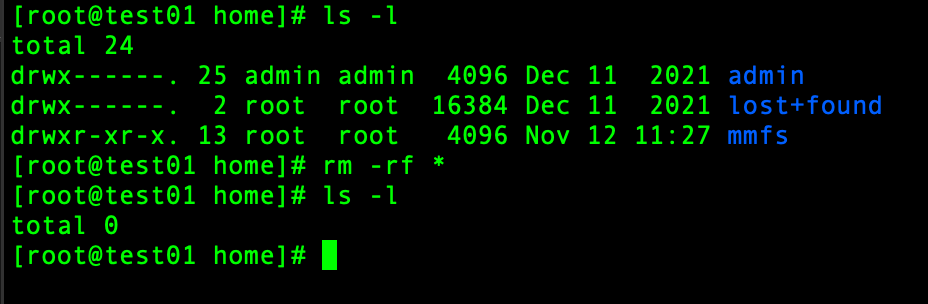
Copy the /usr/lpp/mmfs directory to /home, manually delete files, and prepare the environment
Recovery Steps
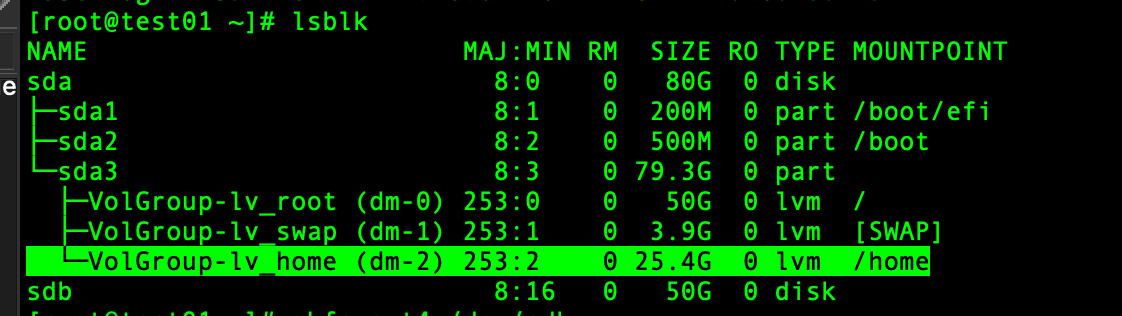
Mount a new hard drive to prevent data overwrite during recovery
- Size depends on the original /home capacity; in practice it requires 3x the original size
Unmount /home, and record the original filesystem mounted on /home
df -h /home
umount /home
Format the new disk and mount it to /home
mkfs.ext4 /dev/sdX mount /dev/sdX /home 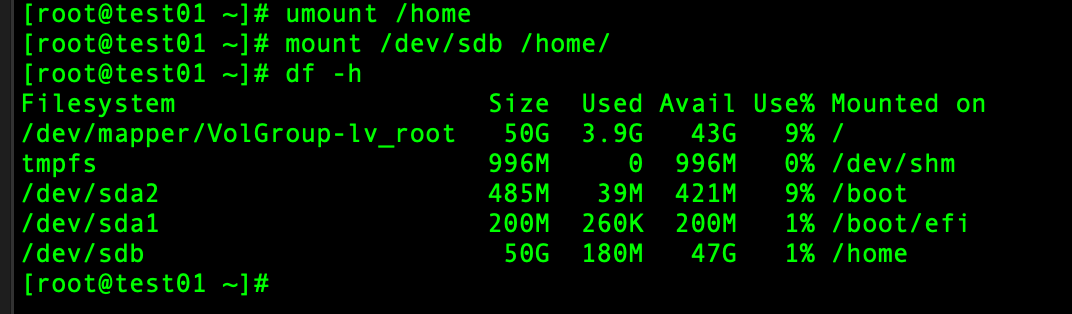
Switch the working directory to the current /home, then run testdisk
cd /home
cp -av /path/to/testdisk.package ./
Extract testdisk tar -xjvf testdisk* 
Run the testdisk tool ./testdisk/testdisk* 
Create the log, default Create, just press Enter. 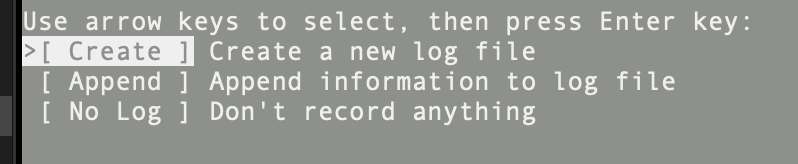
Select the partition where /home was previously mounted and press Enter. 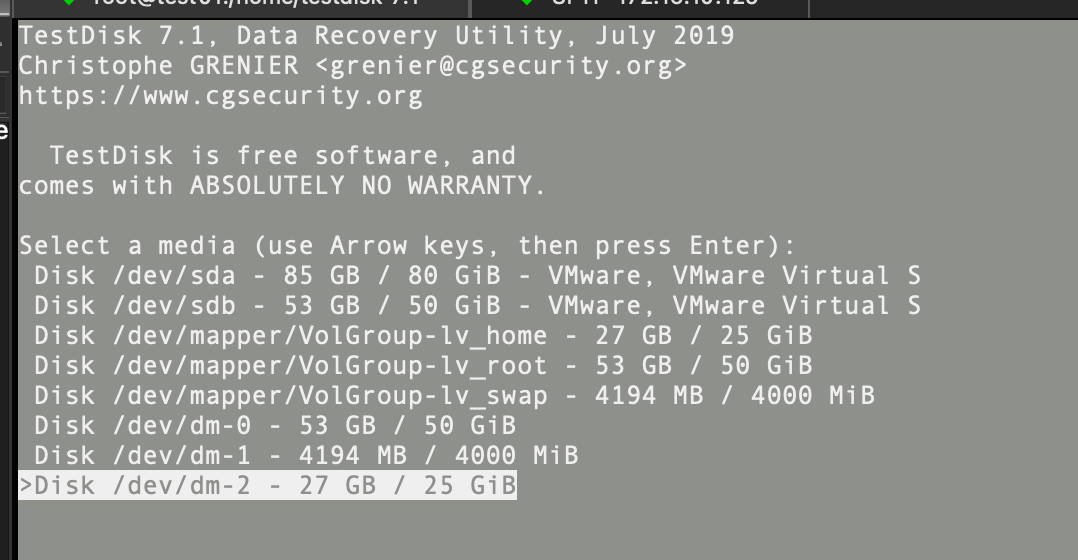
Select [None] No partition table, press Enter. 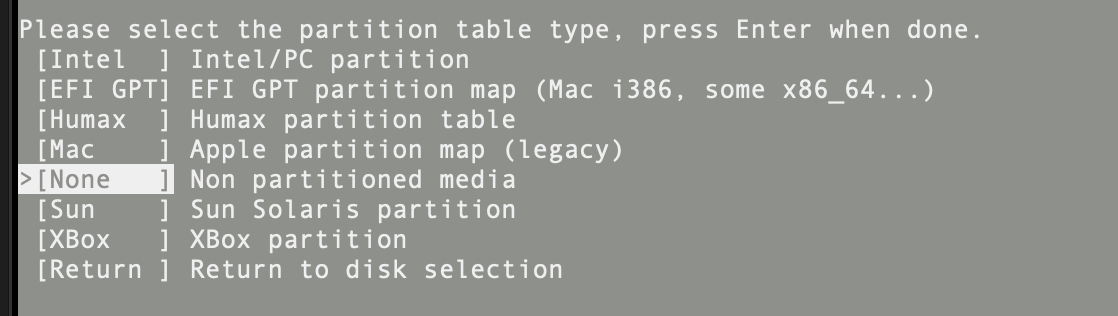
The tool detects an ext4 filesystem. Do not press Enter; use the right arrow key to select [ List ] at the bottom, then press Enter. 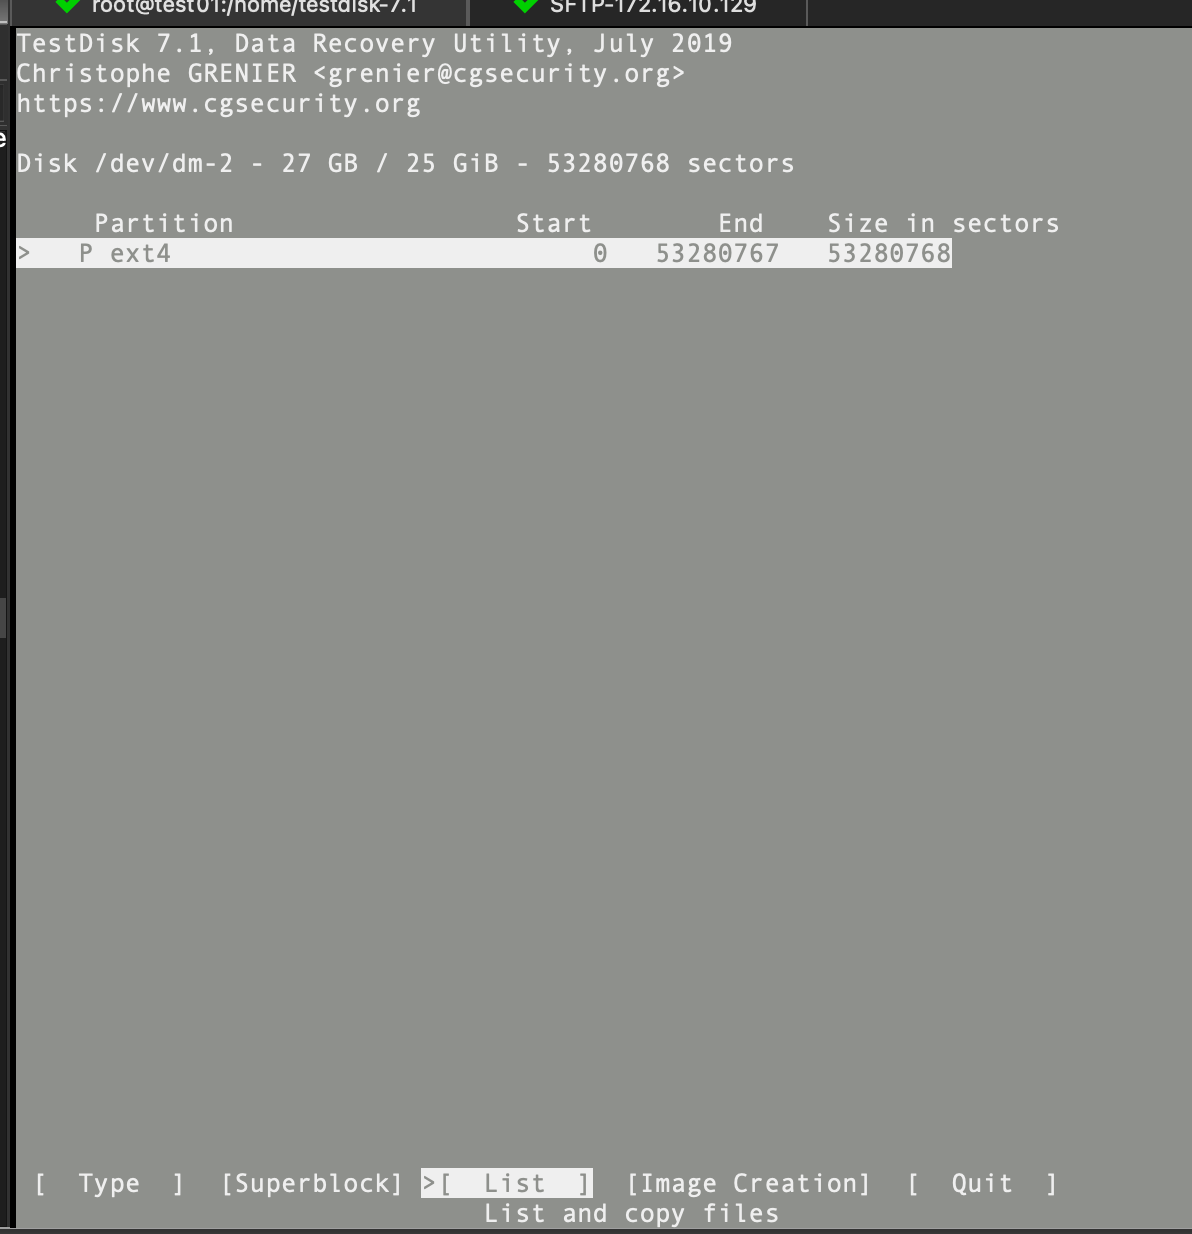
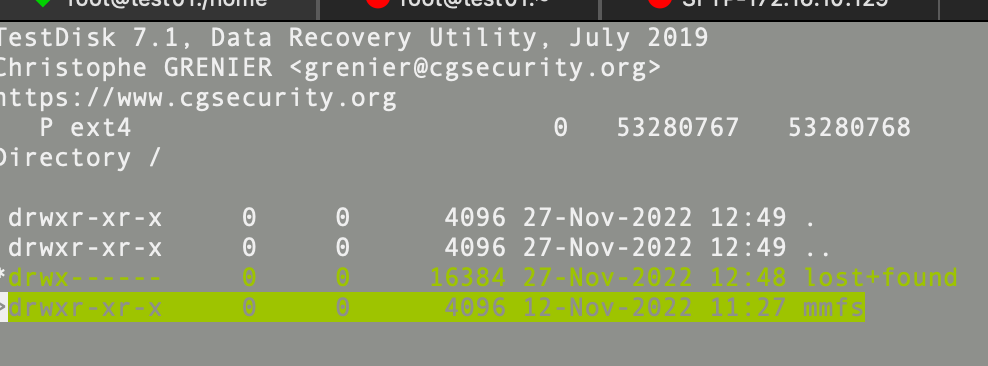
After List, you may accidentally delete directories or files previously under /home; use the
- Colon: select a single directory/file
- a (lowercase) selects all (pressing a again after selection will deselect → the selected entry turns green, if the terminal has color configured)
After selecting the file/directory to restore, press C (uppercase) to enter the next screen and choose the file dump directory
Use the up/down arrow keys to navigate (right arrow enters a directory, left arrow goes back to the parent). In this example, to avoid destroying data, the filesystem mounted on /home was replaced from the original LV with /dev/sdb. Select the current directory, which is the current /home '.', then press C (uppercase) to start the recovery process. 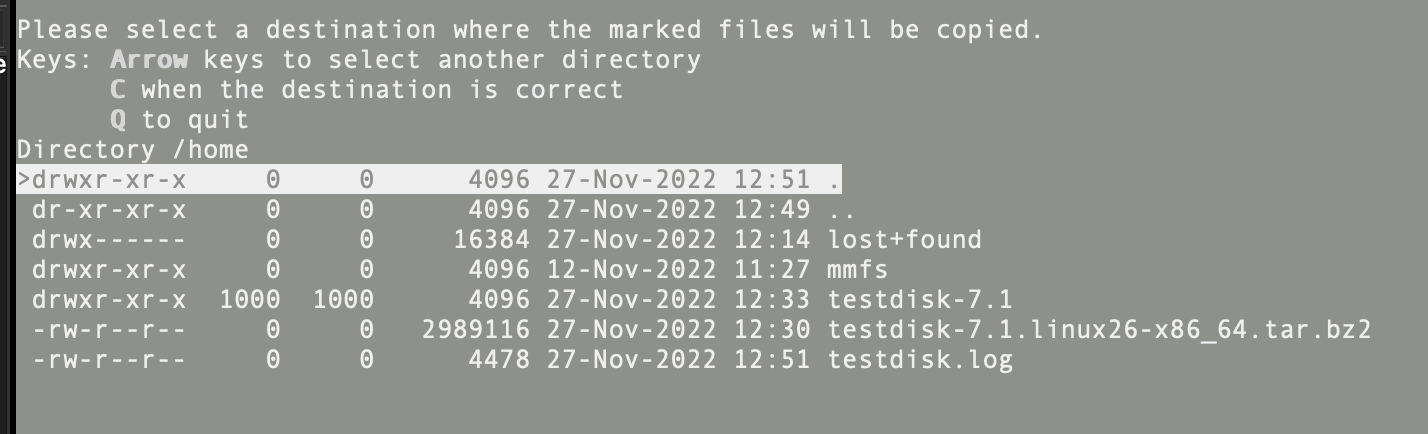
Progress starts running normally; after Copy done you can exit the tool to verify.
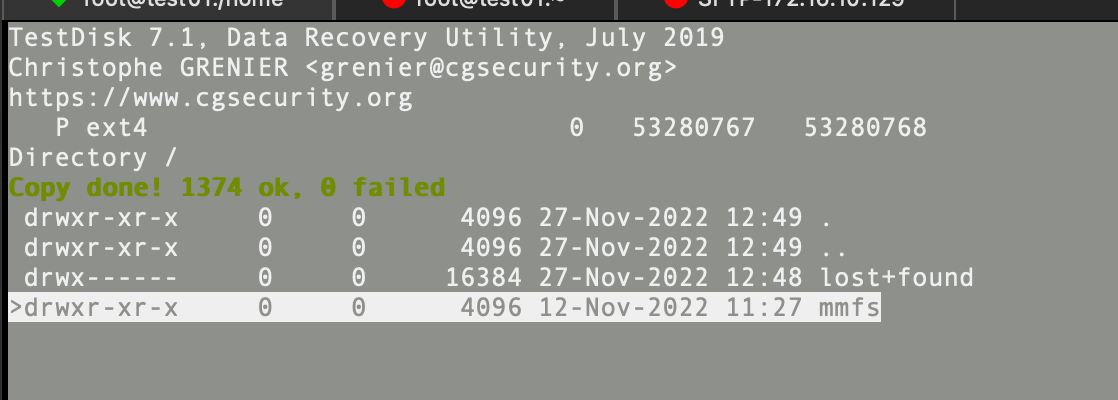
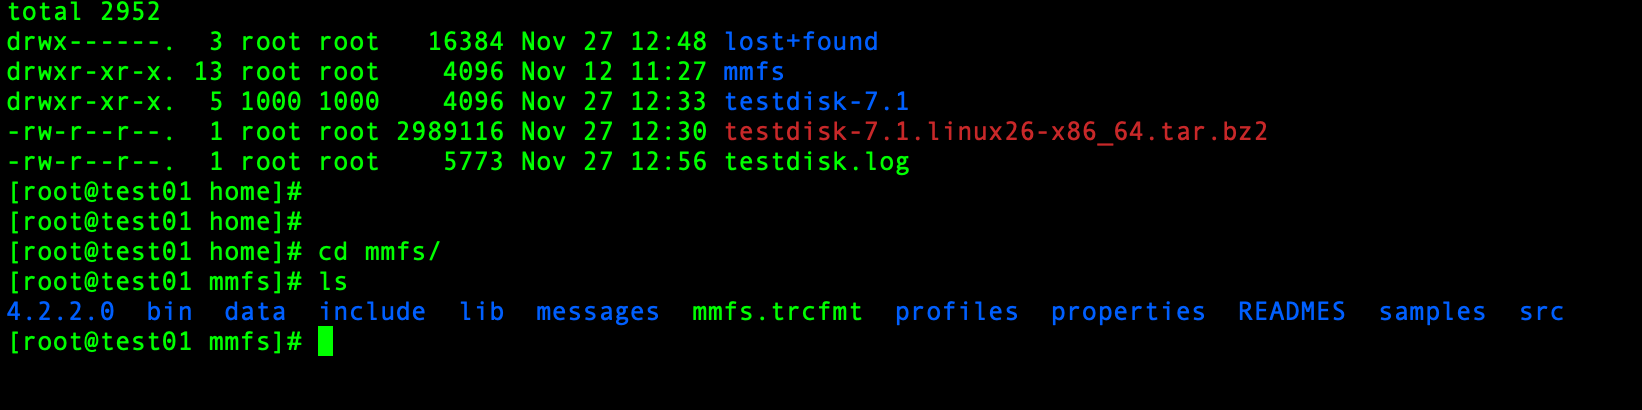
When done, press q --> [Quit] to exit, and verify the file.
评论Comments
加载中…Loading…
留下评论Leave a comment