Fujitsu T2000 Hard Drive Replacement
The official manual's description of replacing the hard drive on this machine is very brief. Roughly translated, the Fujitsu T2000's hard drive is hot-swappable
The official manual's description of replacing the hard drive on this machine is very brief. Roughly translated, the Fujitsu T2000's hard drive is hot-swappable, but it depends on how the drive is configured and used. Before safely hot-swapping, the drive must first be taken offline, which specifically means disconnecting any data communication between applications and the drive and removing any logical links to the drive, unmounting the filesystem on the drive, or making some RAID configuration. The drive cannot be hot-swapped in the following cases:
- The operating system is installed on this hard drive, but the system has no root disk mirror.
- The online operations in the server system are logically related to the hard drive that needs to be replaced.
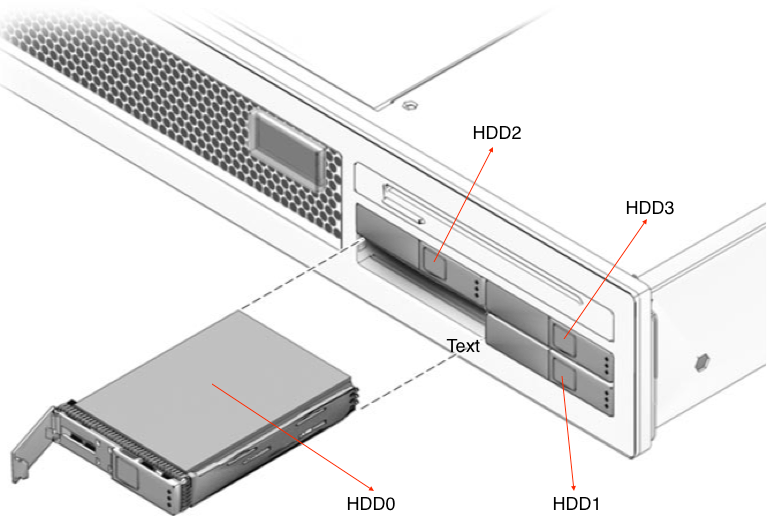
Before replacing any hard drive, you should confirm its physical slot. For the Fujitsu T2000 server, the four drive bays are shown in the image below.
In the system, use the command iostat -E or iostat -En to view the number of disks. Adding the -n parameter only changes how the names are displayed.
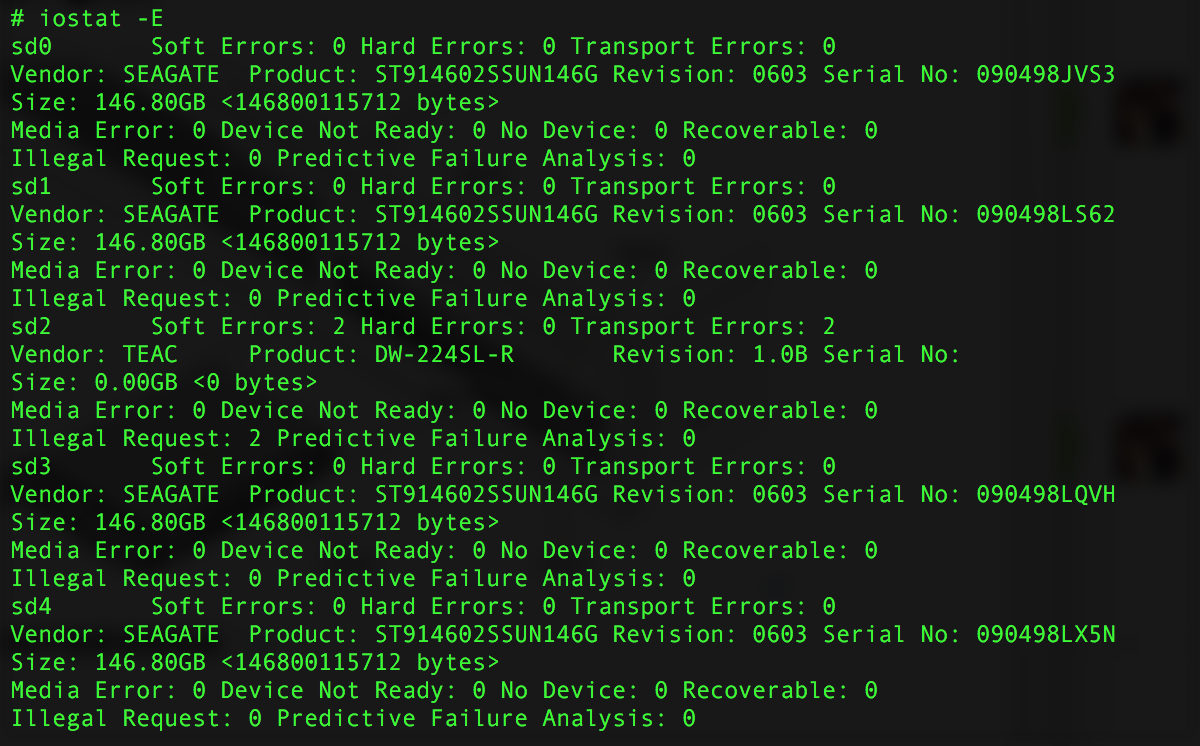
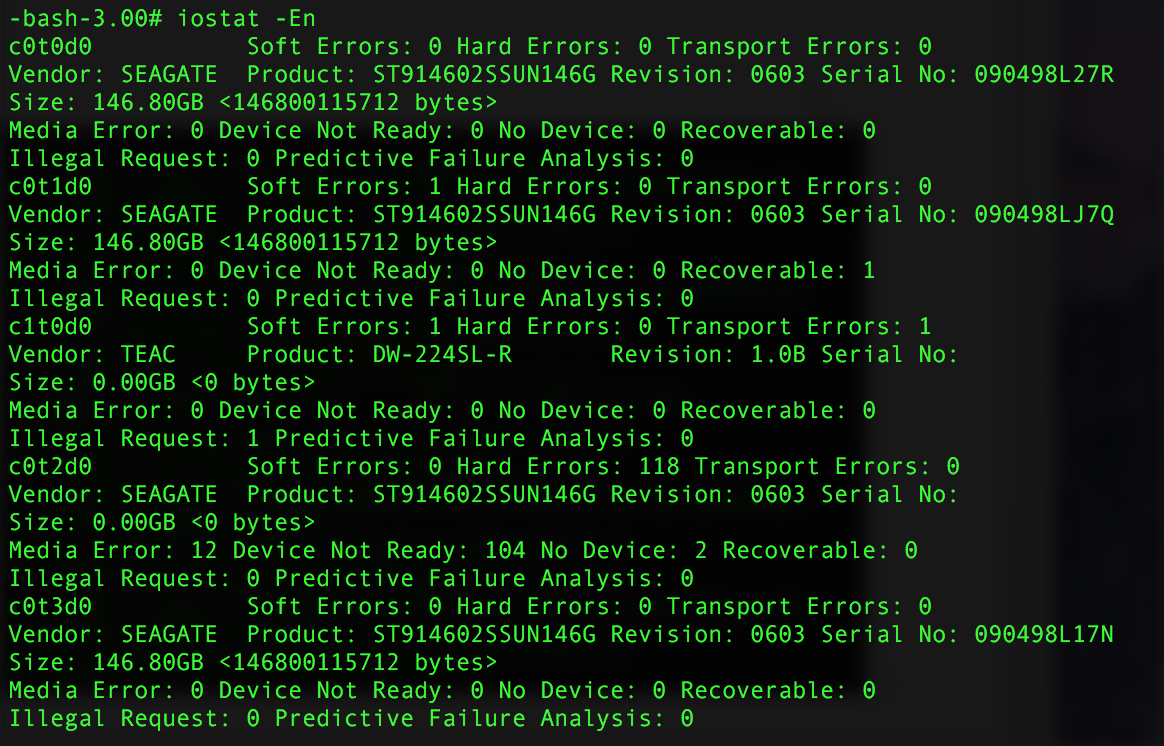
As shown in the figure, this system has four hard drives: c0t0d0, c0t1d0, c0t2d0, and c0t3d0, plus one CD-ROM drive c1t0d0.
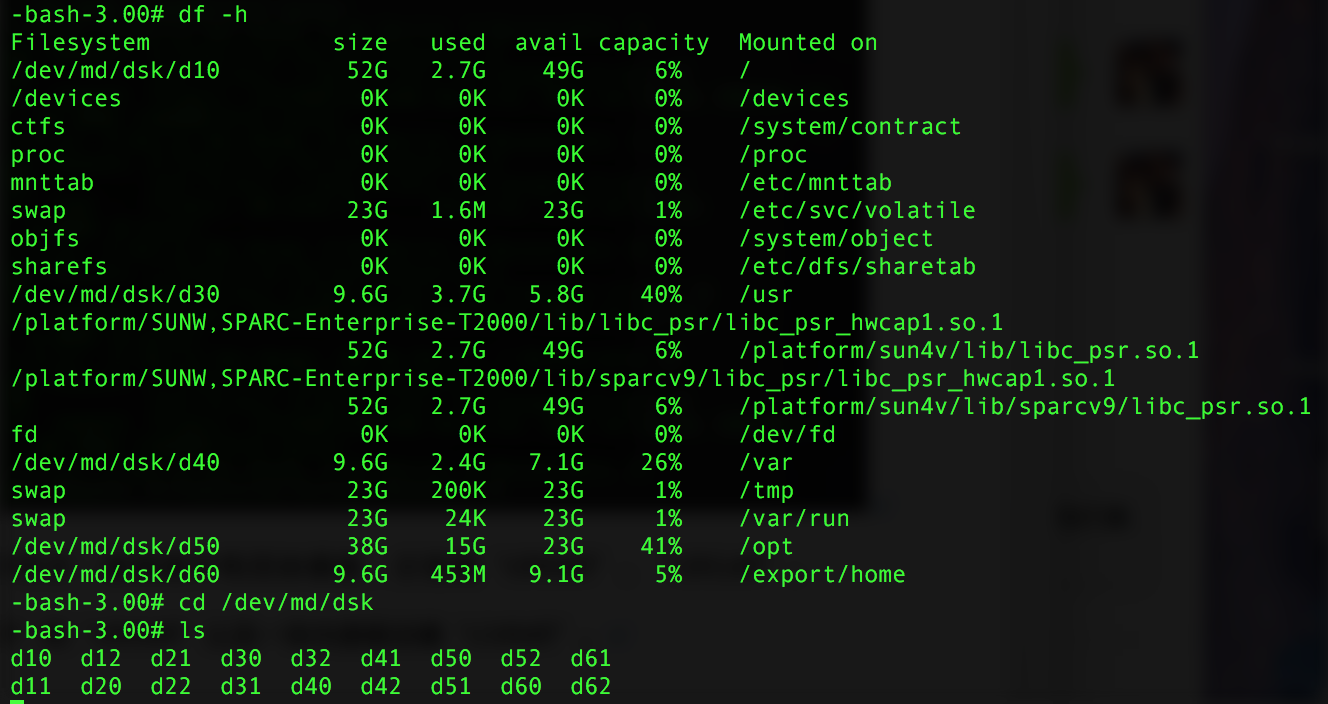
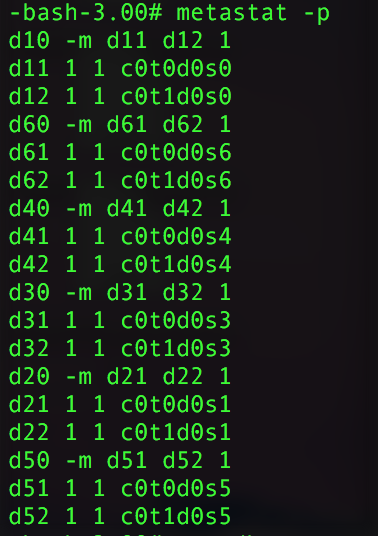
Looking at the files under /dev/md/dsk, the system has six mirrors: d10 is mounted as root /, d20 is the swap partition, d30 is mounted at /usr, d40 at /var, d50 at /opt, and d60 at /export/home. Each mirror has two submirrors.
Initially it appears the system is set up with a root-disk mirror. We need to inspect the status of each mirror to confirm.
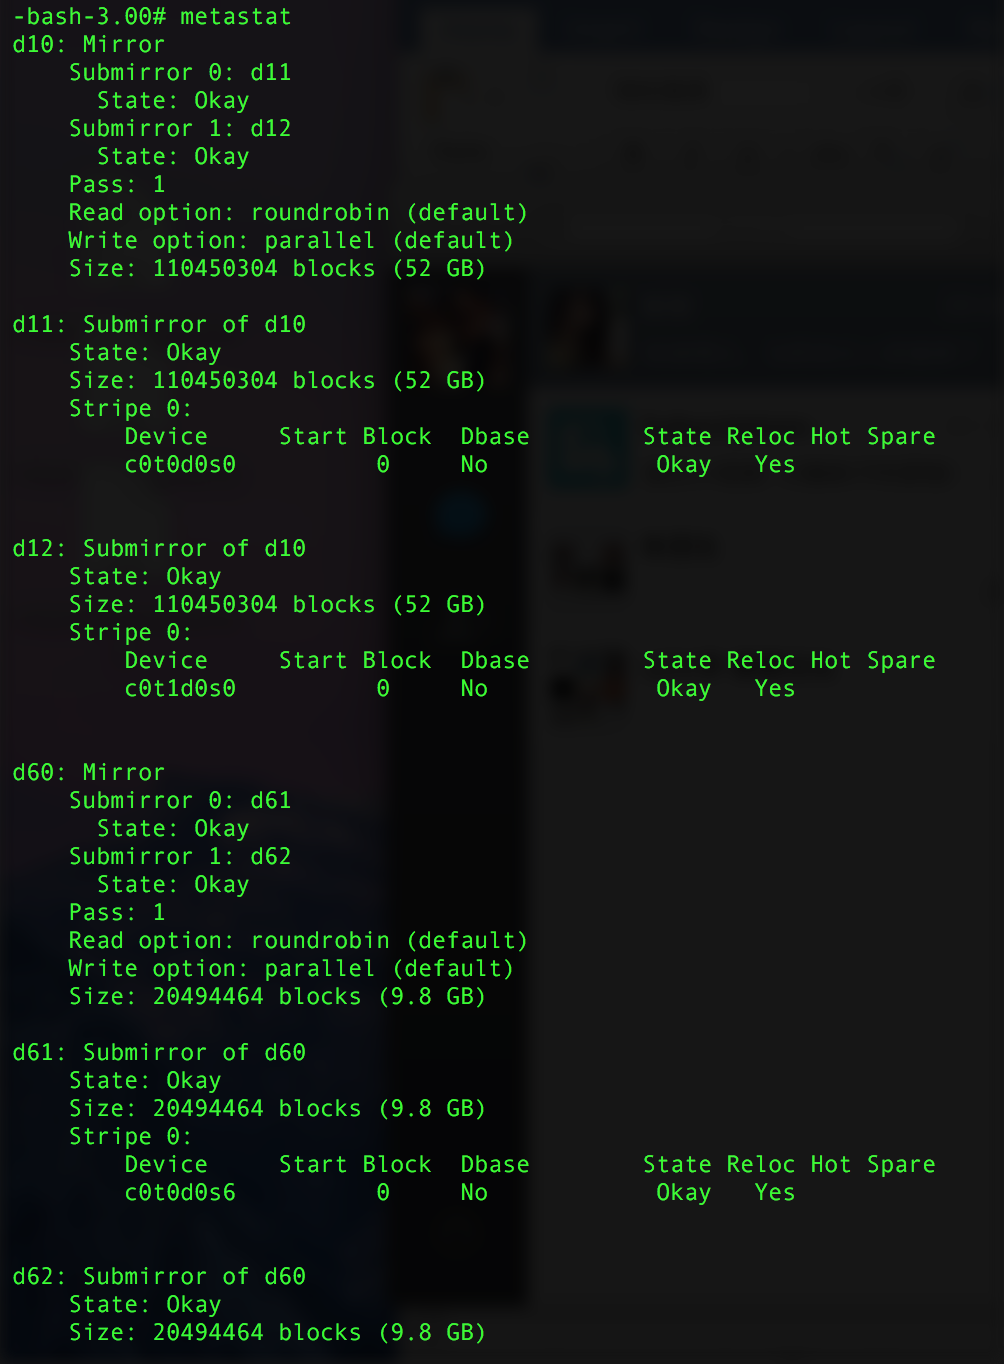
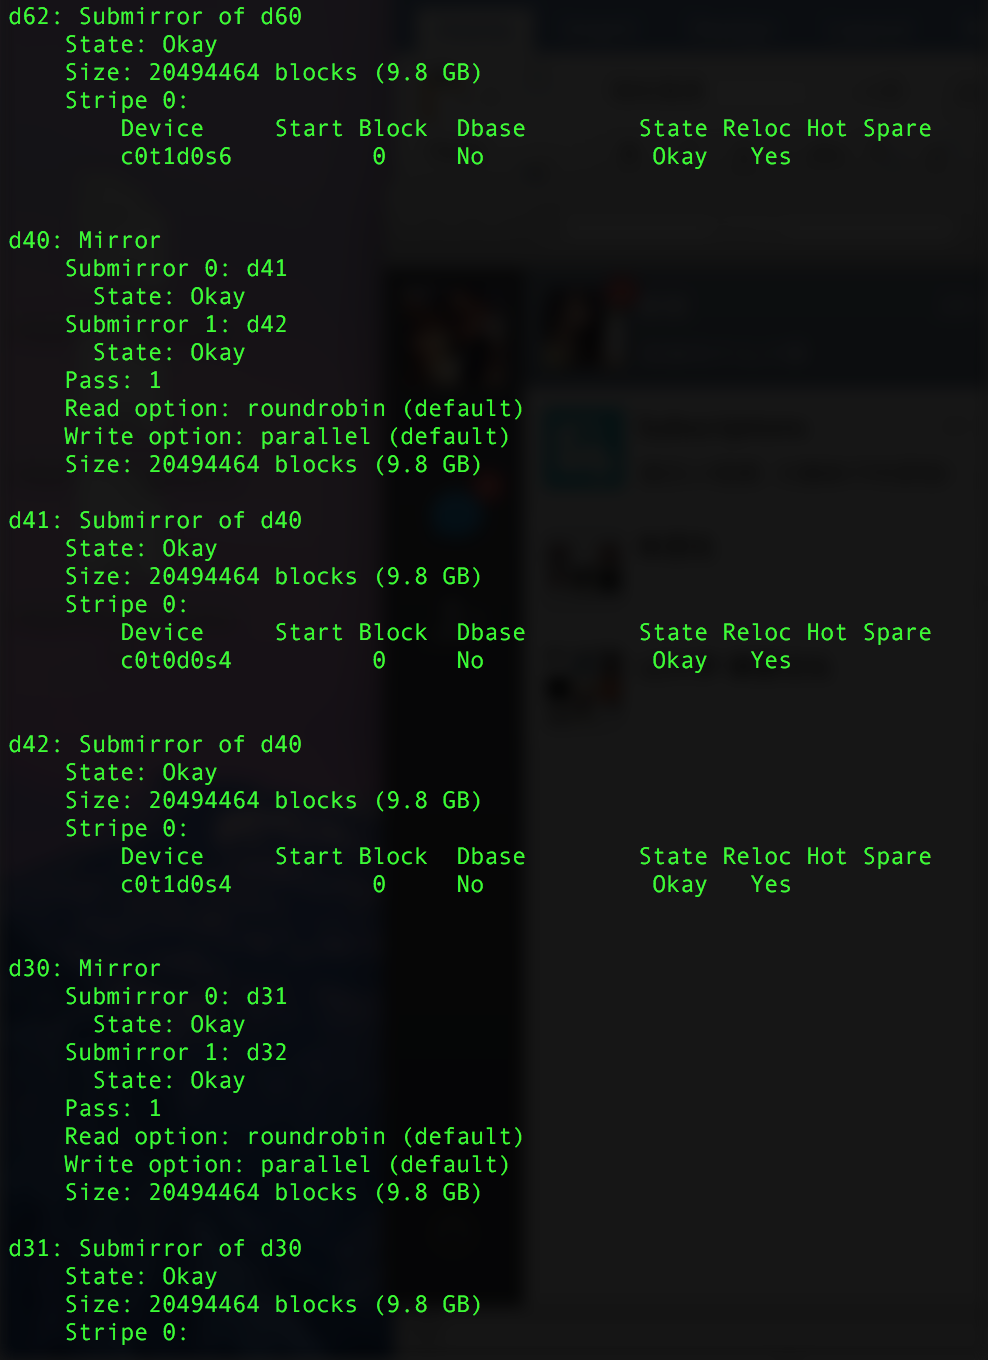
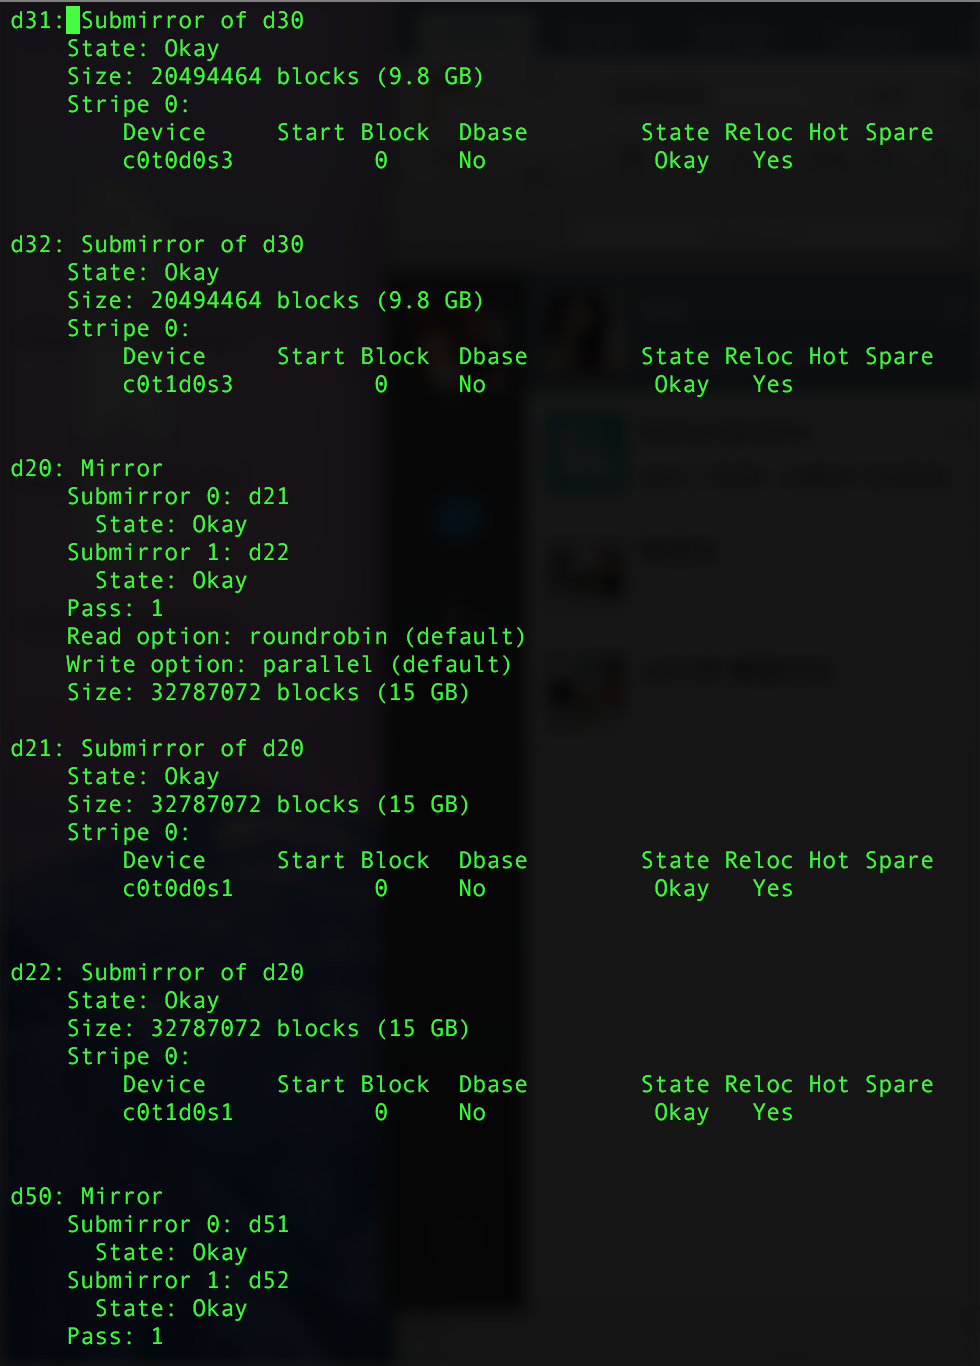
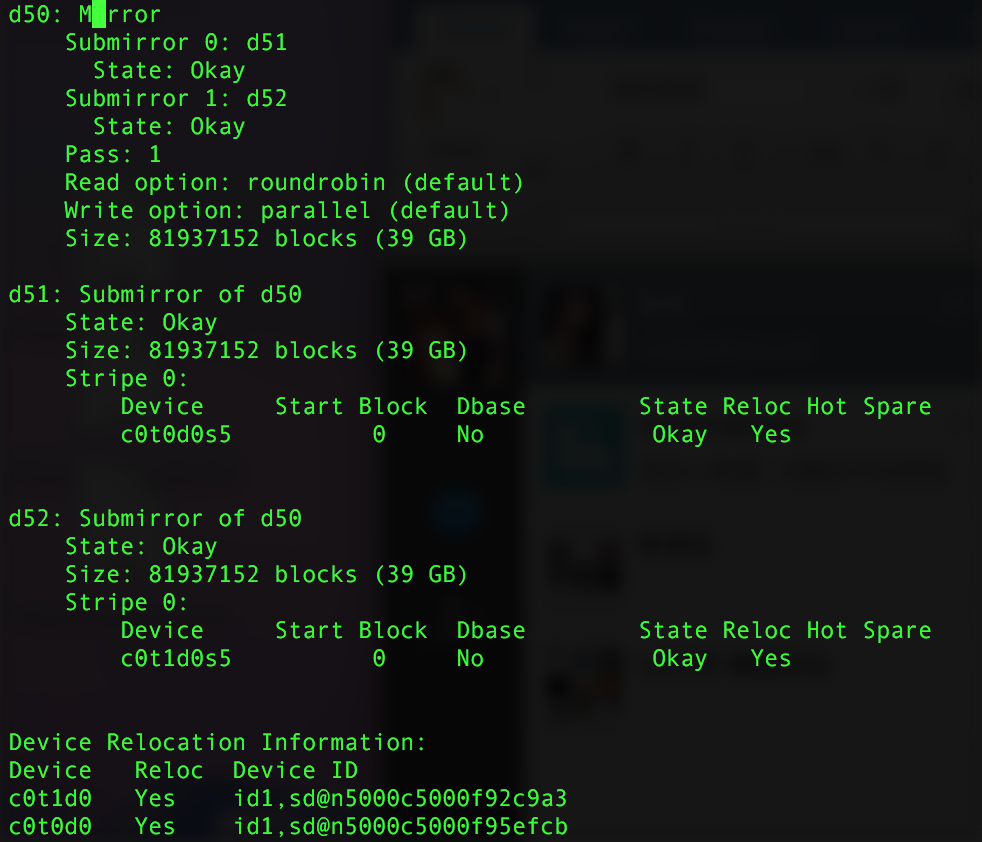
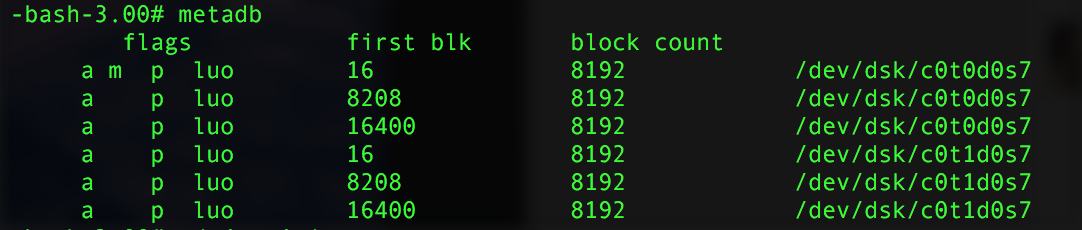
Based on the output of the three commands above, the hypothesis is confirmed. In this system, hdd0 (c0t0d0) and hdd1 (c0t1d0) form the root-disk mirror, and six metadb replicas are stored in partition 7 of each disk.
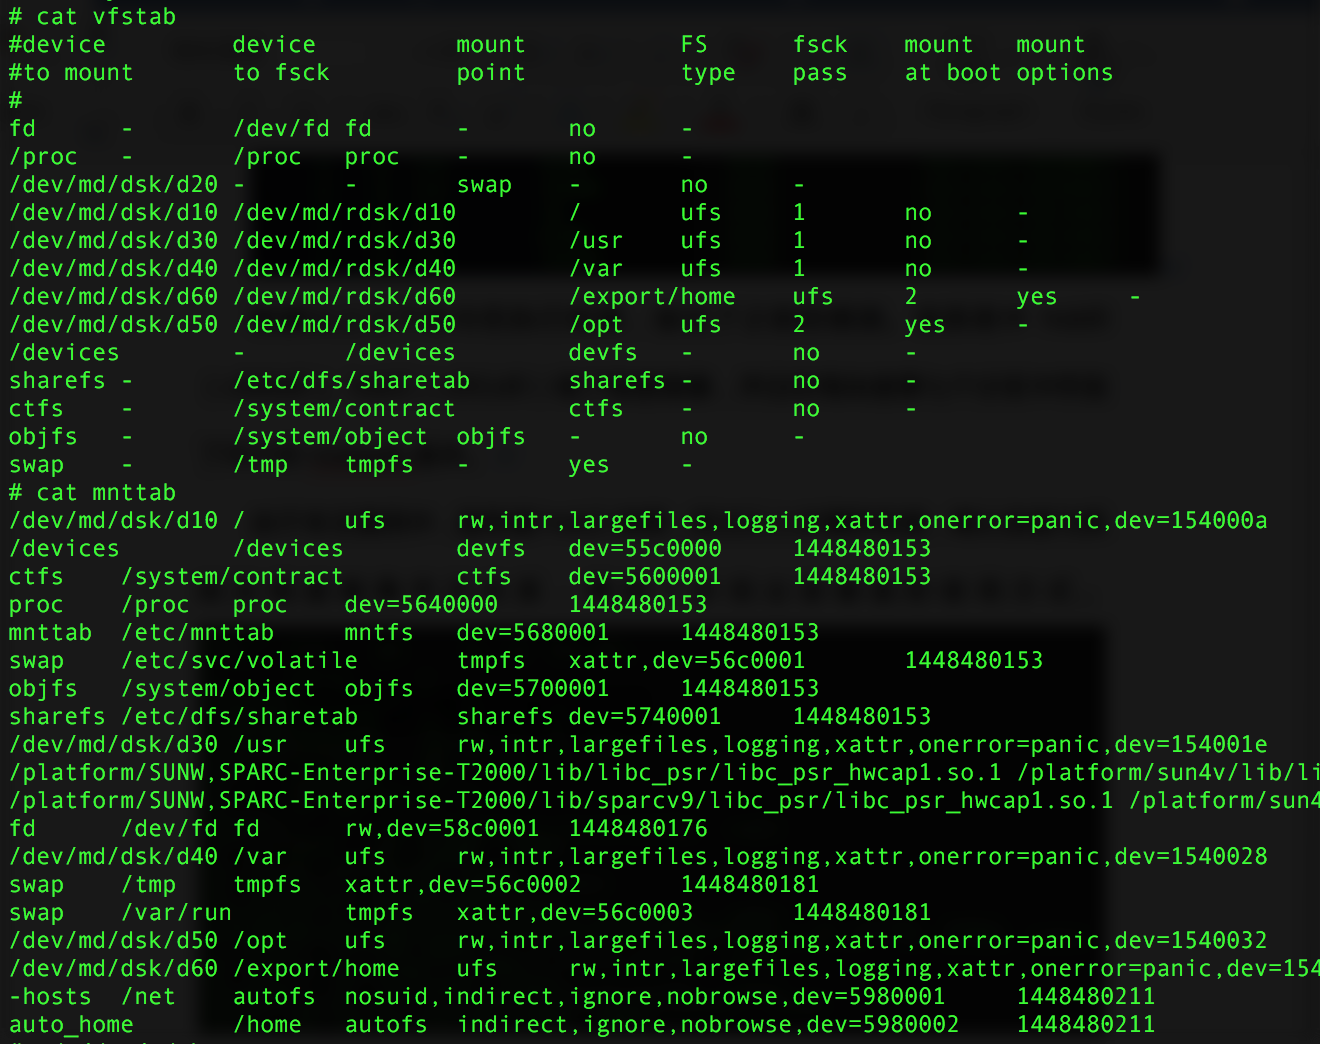
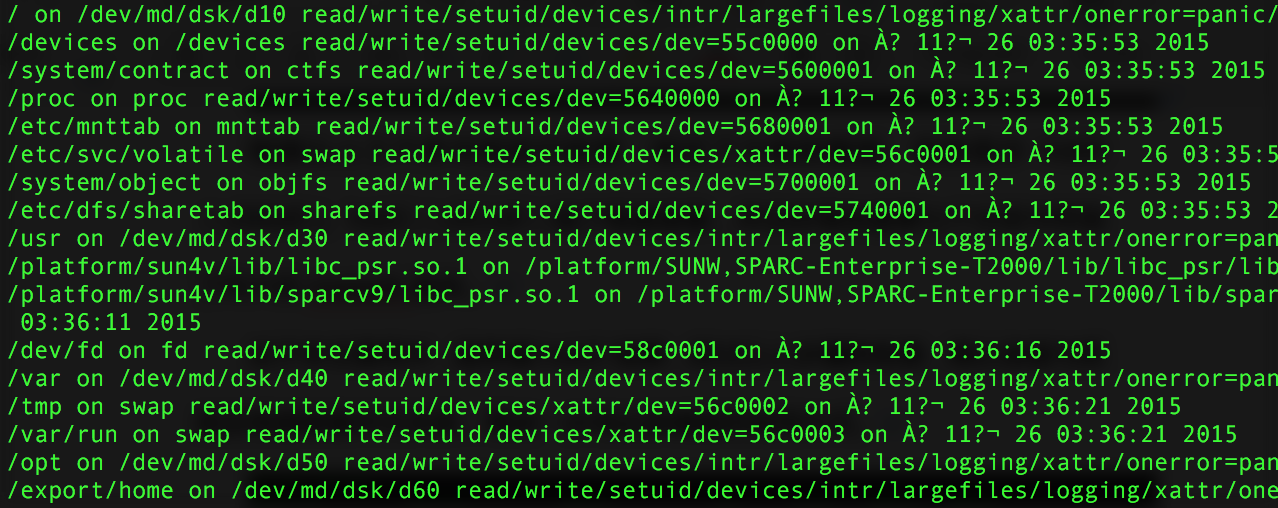
In this case, hdd2 (c0t2d0) on the server has failed. After the checks above, we've confirmed that this disk has no relationship with the system or the root-disk mirror; we need to determine how the disk was being used. Check the contents of vfstab and mnttab as well as the output of mount to look for any trace of c0t2d0.
With no results from the above, look at the disk's partition information — the disk is already in the offline state in the system. Combining all the information, we conclude that the failed disk c0t2d0 is not part of a root-disk mirror, nor a member of an existing RAID group, nor mounted as a filesystem. So, provided no database is deployed on this system and the failed disk isn't used by a database as a raw device, the drive is idle.
After hot-swapping the disk, the customer raised a new requirement: to RAID-1 the replacement disk with another idle disk and mount it for use.
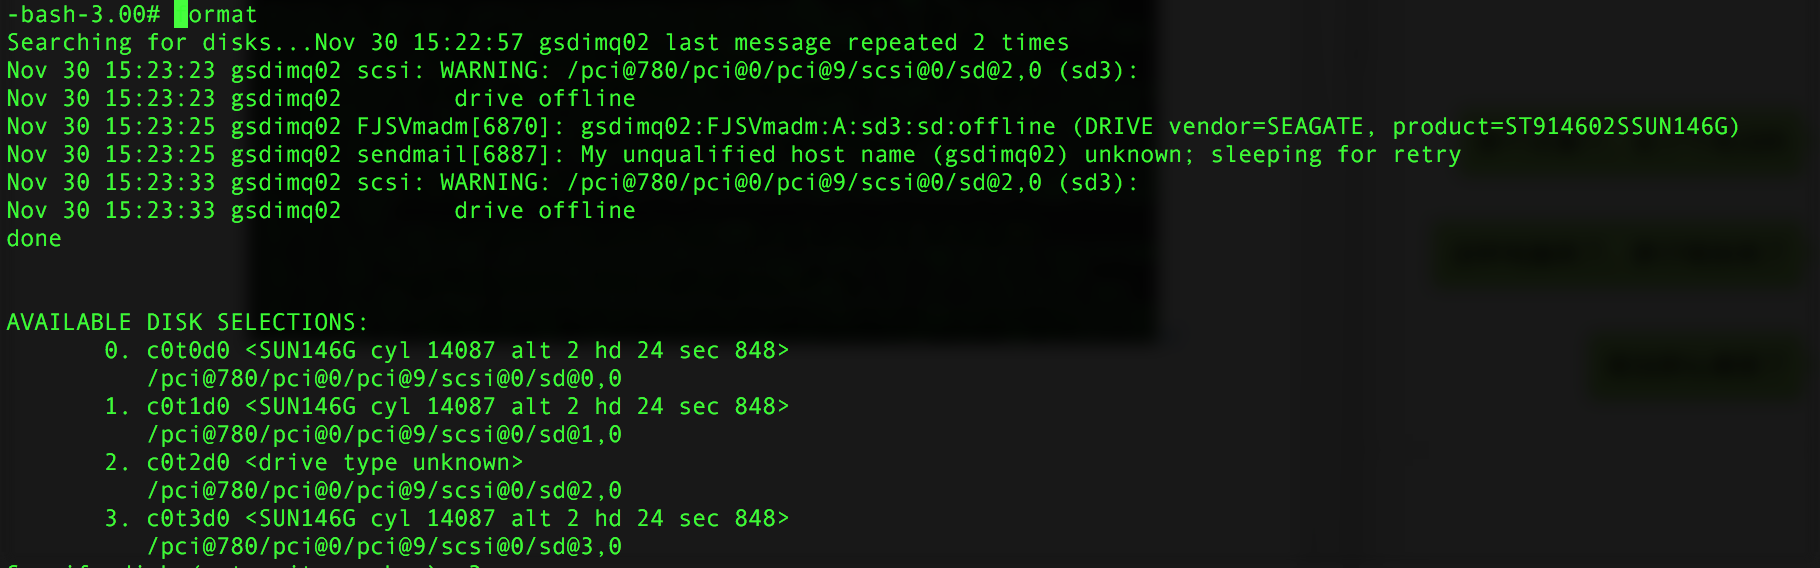
Format the new disk first. After issuing the command, the system reports that the disk label is corrupt; when prompted whether to create a label, confirm yes.


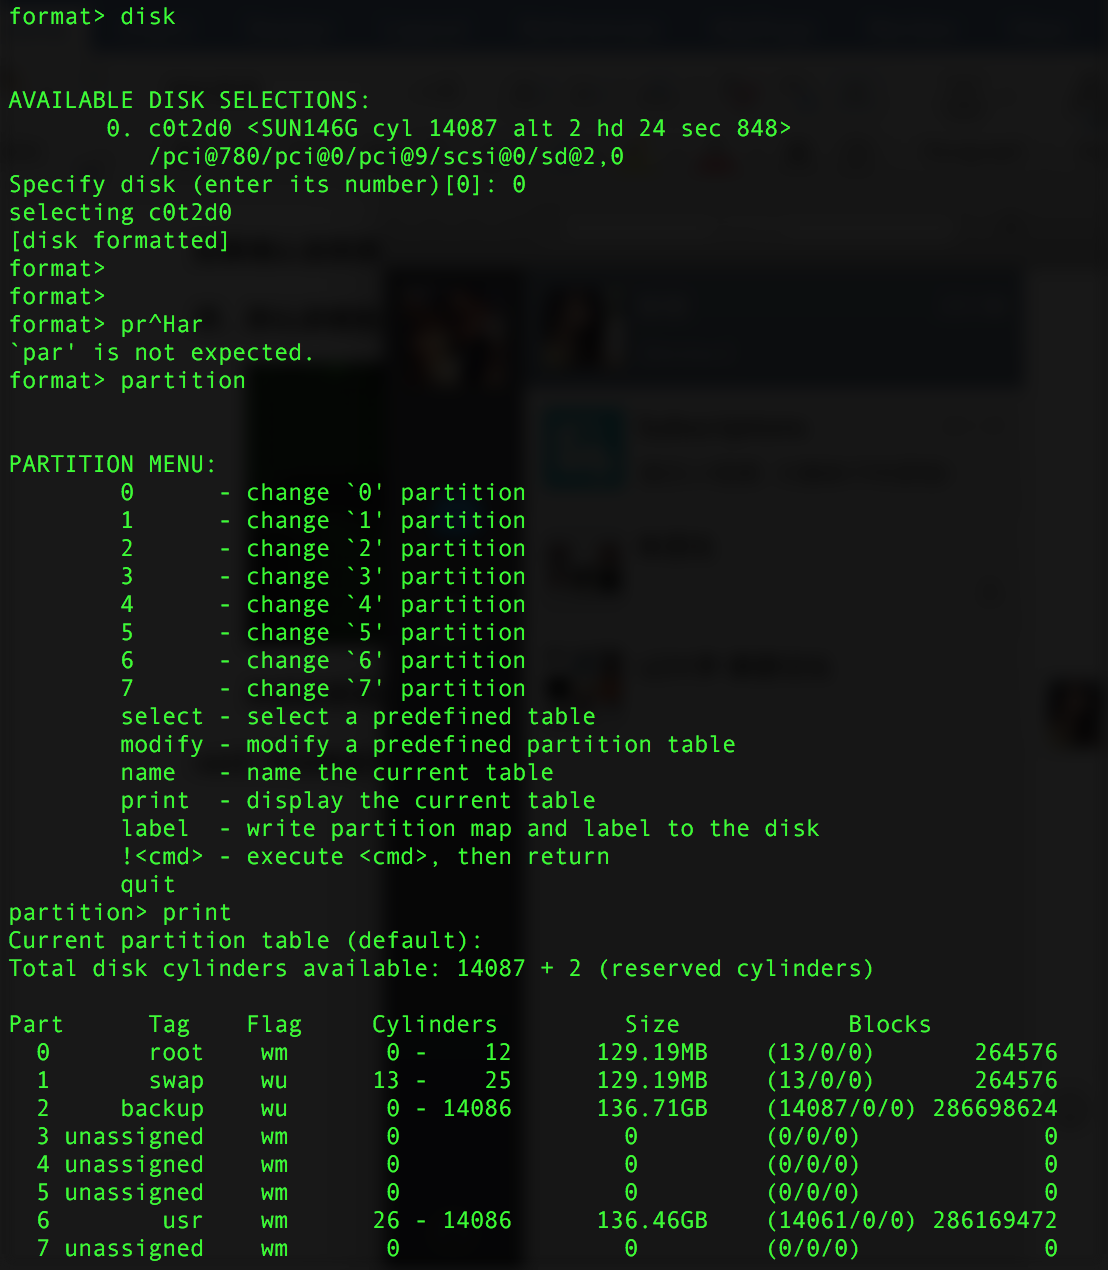
Use disk -> 0 -> partition -> print to view the disk's current partition table. SunOS disks default to eight slices, from c0t2d0s0 to c0t2d0s7. Slice 0 is the root slice, slice 2 covers the whole disk, and the swap partition defaults to slice 1. Therefore slice 2 must exist and its size does not need to be specified manually. Since this will be used for RAID, the partition table needs to hold the metadb replicas as well as the data — three slices in total.
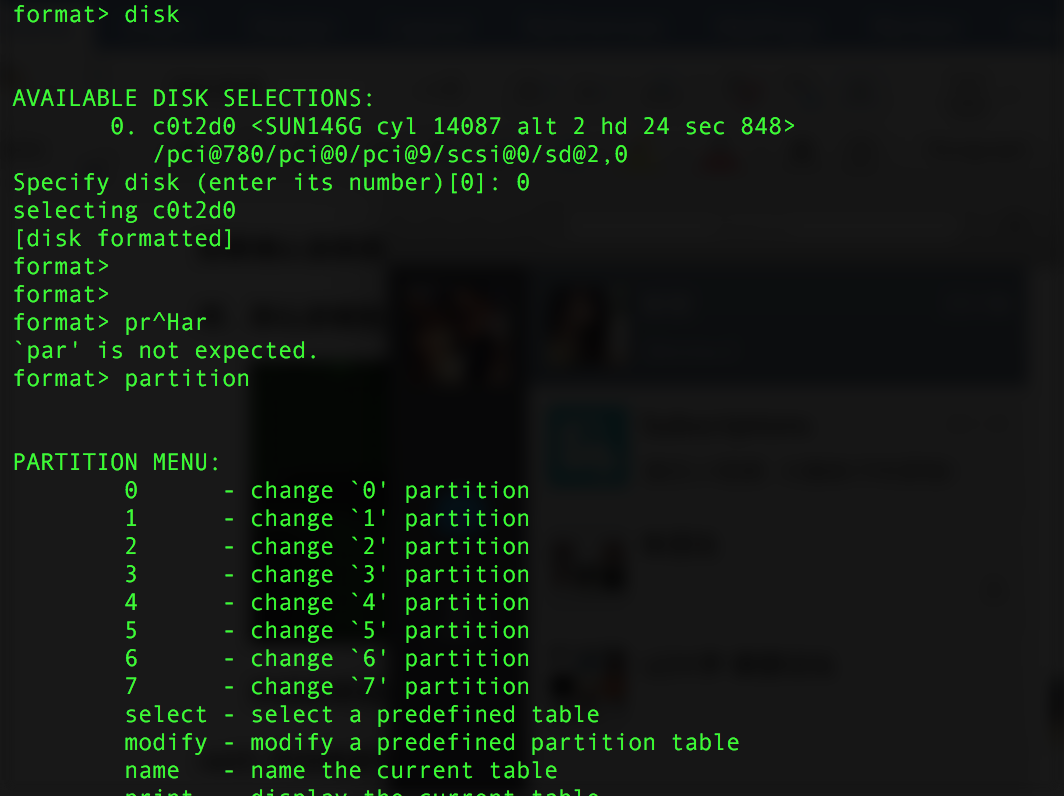
After entering the partition command, select the slice number to modify its size and attributes. Here wm means writable and mountable, wu means writable but not mountable, rm means read-only but mountable, and ru means read-only and not mountable. As the names suggest: w = writable, m = mountable, u = umountable (or rather, the opposite), r = read-only. After confirming the changes, enter m at the partition prompt to commit. Repeat the same procedure on the other idle disk.

The table name can be any arbitrary string.

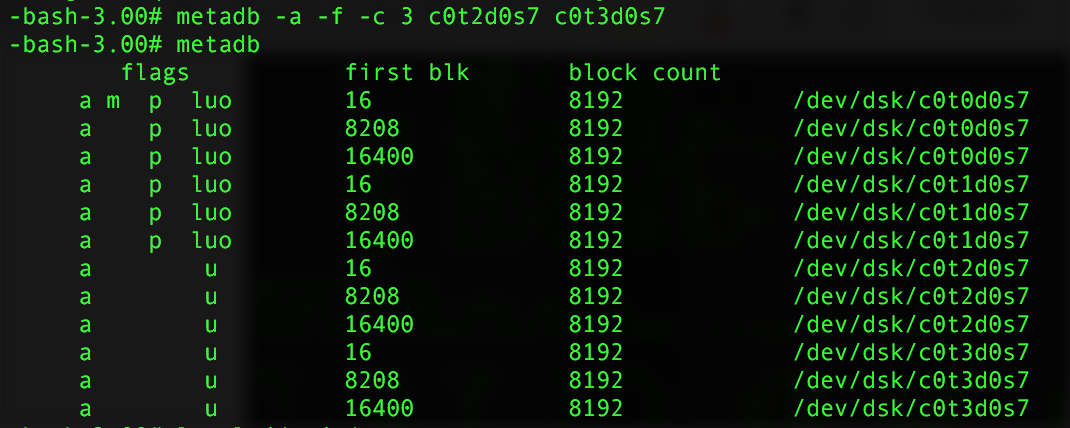
After partitioning, create metadb replicas on slice 7 of both disks. -a adds or creates, -f forces the operation (required when creating the first replica), -c specifies the number of replicas to create, -l specifies the size, and -d removes metadb replicas from that partition.

Create submirrors d81 and d82 on the data slices of each disk, then add submirror d81 to mirror d80.
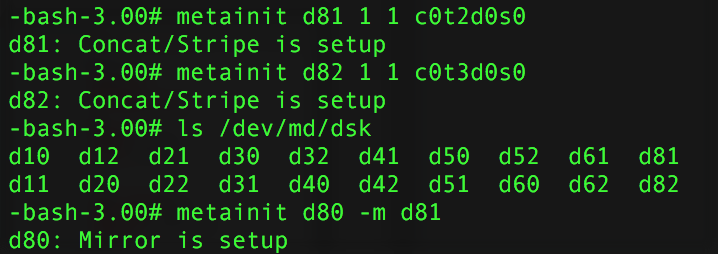
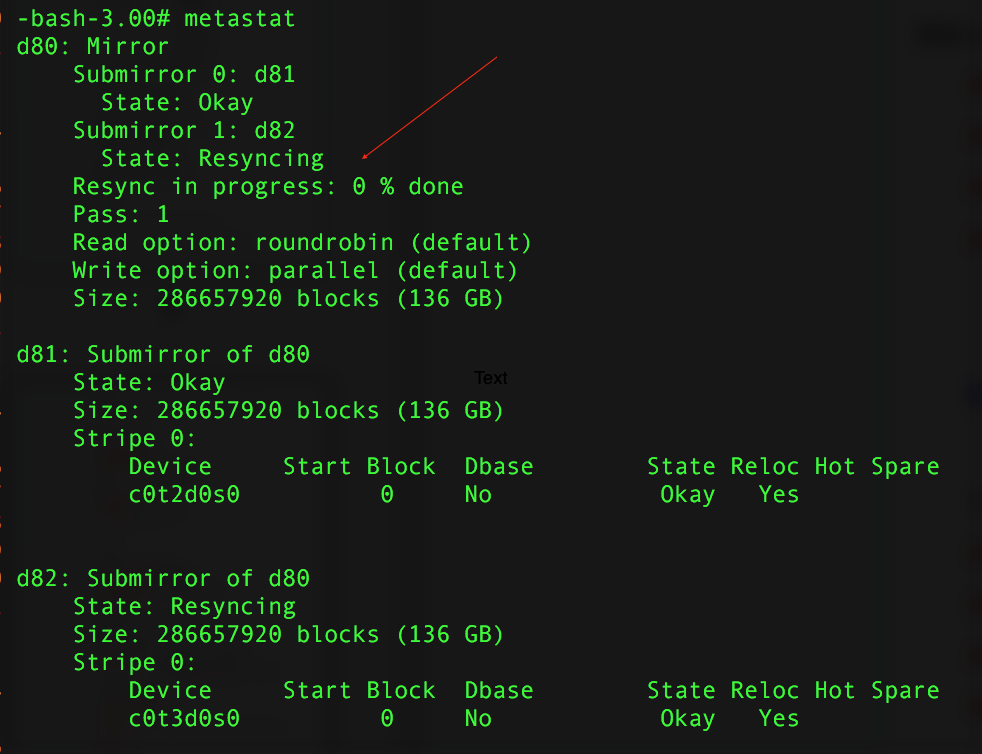
Add submirror d82 to mirror d80. At this point, the two submirrors begin to synchronize data. Use metastat to check the status of the newly created mirror; Resync in progress: 0% done shows the synchronization progress.

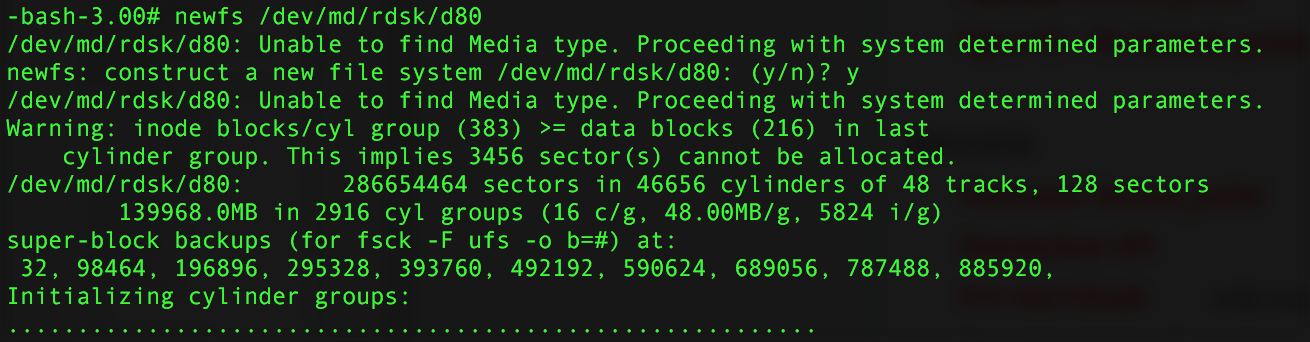
Once the RAID-1 is complete, format mirror d80 and mount it on a directory. If a member disk in the RAID group fails and needs to be replaced, first run metadetch -f d80 d81 to detach submirror d81 from mirror d80, then metaclear d81 to delete the submirror. After hot-swapping the disk and re-partitioning, recreate the submirror with metainit d81 1 1 c0t2d0s0, and finally metattch d80 d81 to reattach the submirror and resync. The steps for RAID-5 and RAID-0 are roughly the same, but for a RAID-1 root-disk mirror, that's a topic for another article.
评论Comments
加载中…Loading…
留下评论Leave a comment