How to Replace Root Disk on AIX 5.3
Sometimes I thought mirroring a root disk was outdated and a hardware RAID card was just what we needed. But then I realized that if the RAID card broke, the ma
Sometimes I thought mirroring a root disk was outdated and a hardware RAID card was just what we needed. But then I realized that if the RAID card broke, the machine broke too. And this never happens with a mirrored disk. But if it does, the only thing you should do is play the lottery. It is truly beyond our human ability for the future and the past. If you search the internet, there will be a lot of websites telling you how to do this work. For you people, I just reinvent the wheel, and for me, this is a way to study. As it says, I have an IBM PS700 series machine with AIX 5.3. I have to shut down the operating system in order to get the hard disk out. So, the steps are: unmirror the rootvg, shut down the OS, replace the broken disk, and mirror the rootvg. Verify the location of the broken disk.  As you see, hdisk1 is broken.
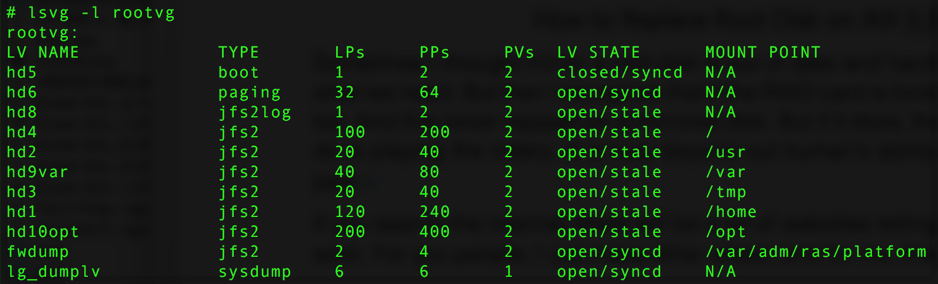
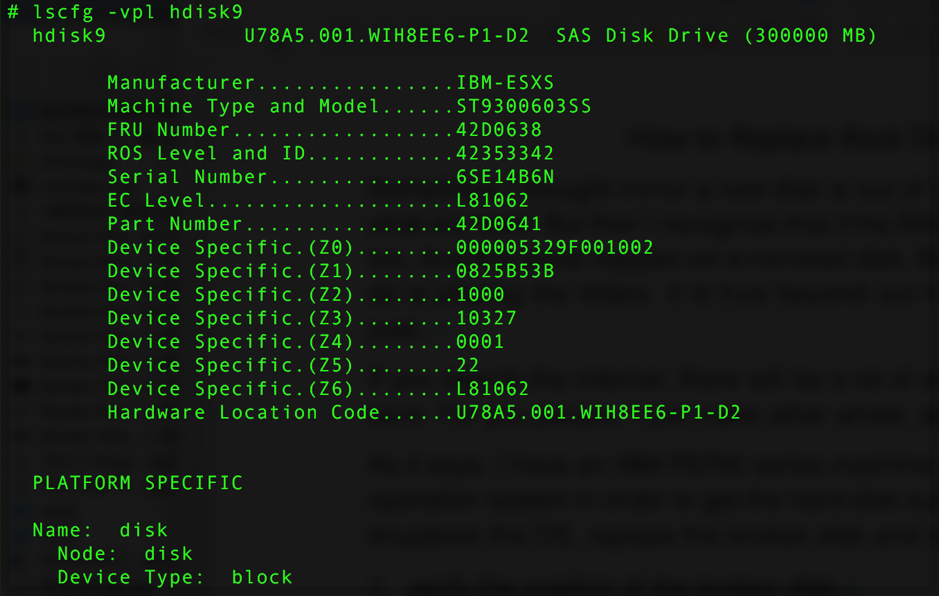
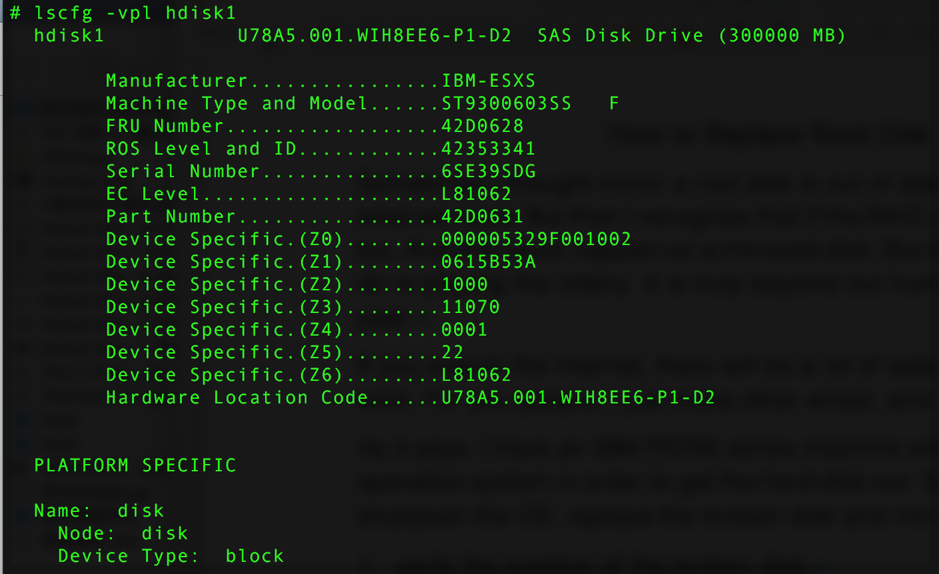 The PN of hdisk1 is "42D0628", the SN is "6SE39SDG". You can buy a disk the same as the broken one using the PN, and verify the location of the broken disk with the SN.
  Make sure the broken PV does not contain a dump lv. If it does, just execute this command:
  Then unmirror hdisk1 from rootvg, remove bootloader information, reduce it from rootvg, and remove it from the OS.
 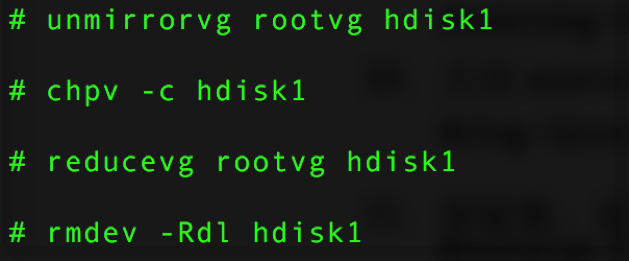 If you execute "lspv –l hdisk1" and the result contains information about "dumplv", you should follow these steps:
  Now you have verified the location of the broken disk, removed it from rootvg and the operating system. Because of the structure of this machine, shut down the OS and replace hdisk1 with a new one. For a normal AIX machine, this step is not necessary. Then make the OS detect the new disk. Make sure it is the one we replaced by using the SN. In this case, it is called "hdisk9" and has no PVID.
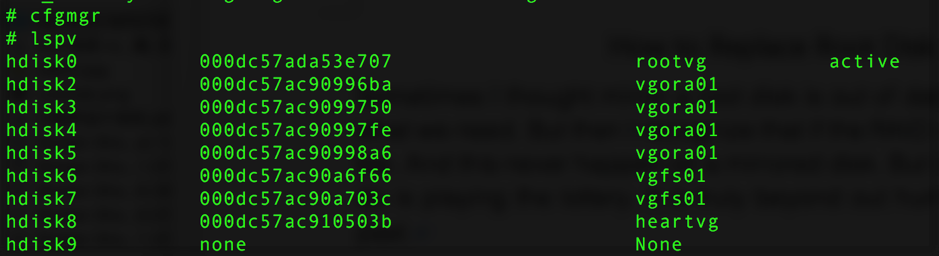
 Assign a PVID to "hdisk9".
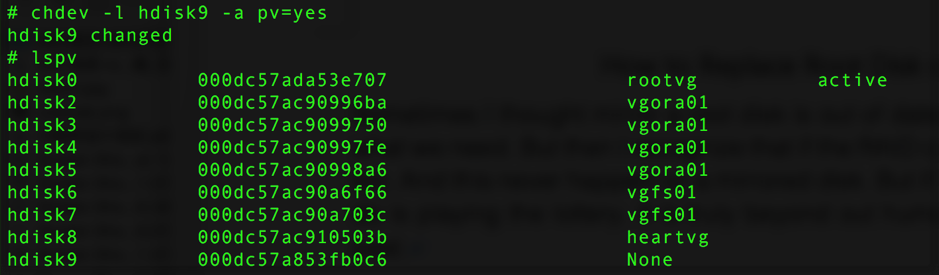
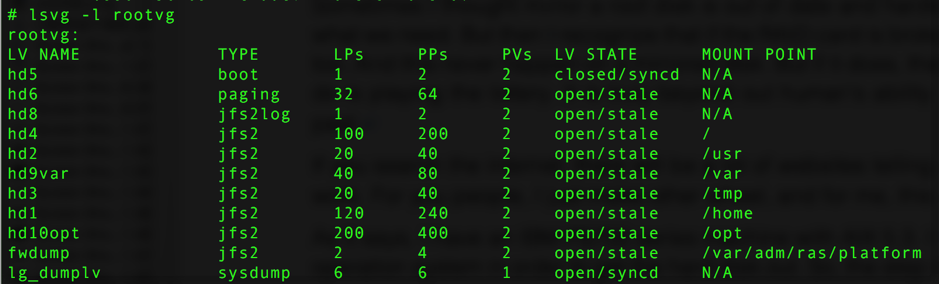
 Extend rootvg with the new disk (hdisk9). As you see, "TOTAL PPs" and "FREE PPs" on hdisk9 are the same. This just tells us the disk has no data on it.
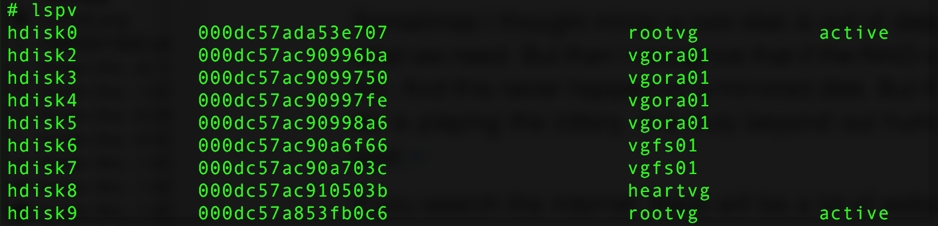
 Close the "quorum" of rootvg then make a mirror to hdisk9. When "closed/stale" becomes "closed/syncd", the mirror is finished.

 Create the boot image on hdisk9 then make the boot order normal.
 If you finish this without any mistakes or error messages, congratulations—you replaced the root disk as successfully as I did.
评论Comments
加载中…Loading…
留下评论Leave a comment