PowerPC Blade Server System Fault Repair Workflow
I. System Environment Hardware: IBM Blade Center H OS: rhel-server-5.9-ppc\_64 II. Fault Symptoms After security hardening, the system could not boot normally a
I. System Environment
Hardware: IBM Blade Center H OS: rhel-server-5.9-ppc_64
II. Fault Symptoms
After security hardening, the system could not boot normally after restart. The error is as follows:
Authorized users only.
All activity may be monitored and reported.
(none) login:
INIT: cannot execute "/usr/sbin/gdm"
INIT: ID "x" respawning too fast: disabled for 5 minutes
III. Approach
Whenever a Linux system fails to start normally and you cannot enter single-user mode, you first need to use a CD rescue mode or a USB LiveCD. Mount the original system partitions according to the /etc/fstab file, then modify or repair the critical file content and reboot. Solutions for the errors above are not hard to find online. Most of them suggest waiting for the system to reach the GRUB boot menu, modifying parameters to enter single-user mode, changing the digit after id: in the /etc/inittab file from id:5:initdefault: to 3, so that the system boots into text mode by default, then running startx to see the specific error from the graphical interface.
As a side note, the first non-commented line in the inittab file with id equal to 3 means default to file/text mode, and id equal to 5 means default to graphical mode. The number represents the Linux runlevel, so init 0 in the command line means shutdown, and init 6 means reboot.
If simply modifying a few files as described above could solve the problem, there would be no need to write this article specifically. The difficulty of this case is that the server uses a PowerPC chip, the system is booted via "Yaboot", and the manuals for this bootloader on the web are extremely scarce.
4. Handling Process
1. Enter Rescue Mode
Connect the IBM management module's network port to your laptop.
The default address is "192.168.70.125", the username is "USERID", and the password is "PASSW0RD" (note the digit zero).
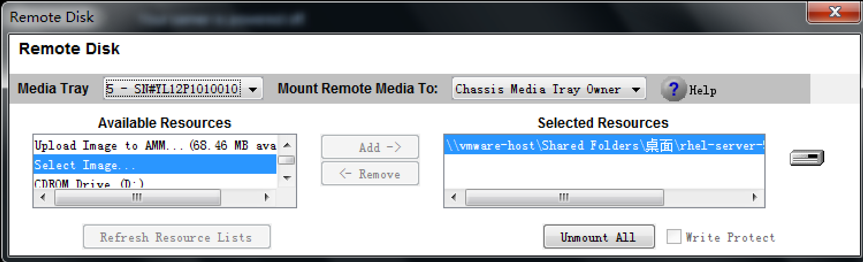
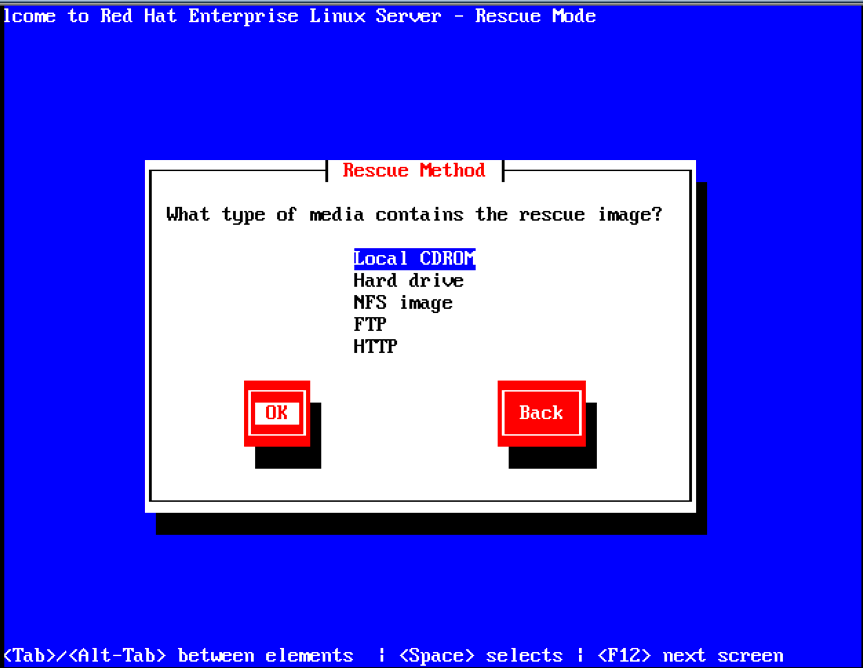
Open a browser and enter the default address. Once in the management interface, find the virtual KVM (the menu name is something like Remote **), as shown below. Click "Remote Drive" -> "Select Image" -> "Add" to choose a local image, or "CDROM Drive (D:)" to choose a local optical drive, then "Mount All", and only then start the blade server. Otherwise the system won't detect the newly added device.
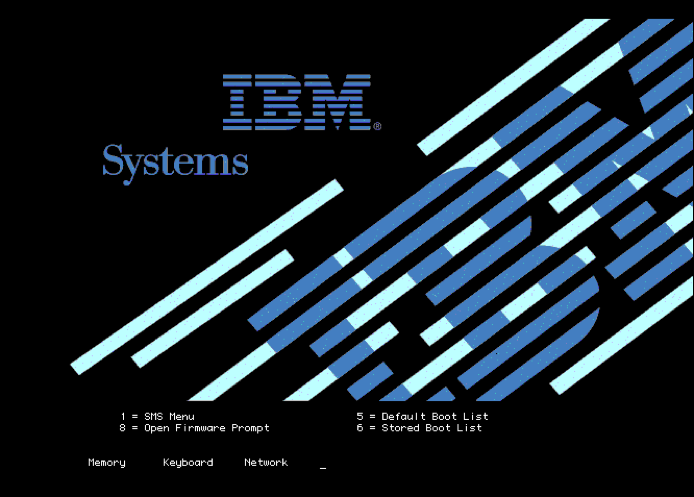
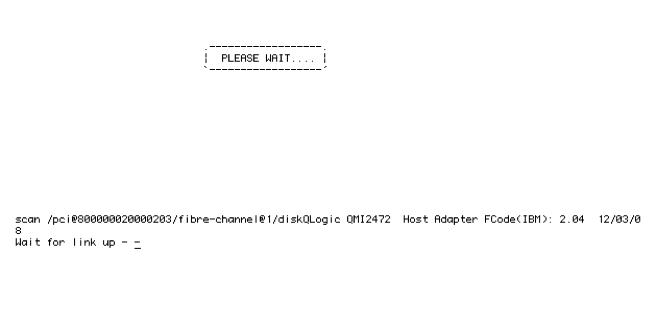
When the system boots and shows the following screen, quickly press "1" to enter the IBM SMS tool menu.
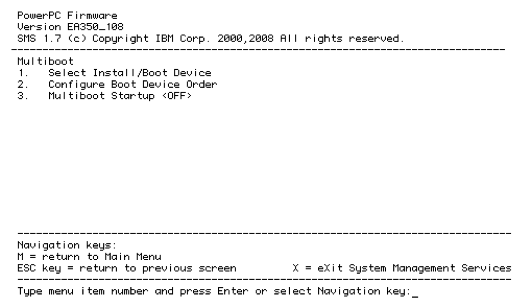
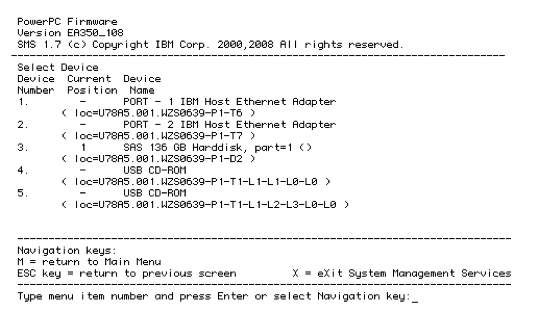
Select "5. Select Boot Options" and press Enter.

Select "1. Select Install/Boot Device" and press Enter.
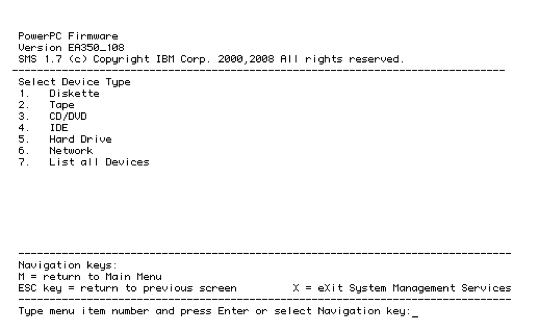
Select "7. List all Devices" and press Enter to scan for bootable devices.
As shown below, "4. USB CD-ROM" is the newly added disk image. Select it and press Enter. (The actual one depends on the machine—just try a few times; as long as it's not the local disk, you'll find it.)
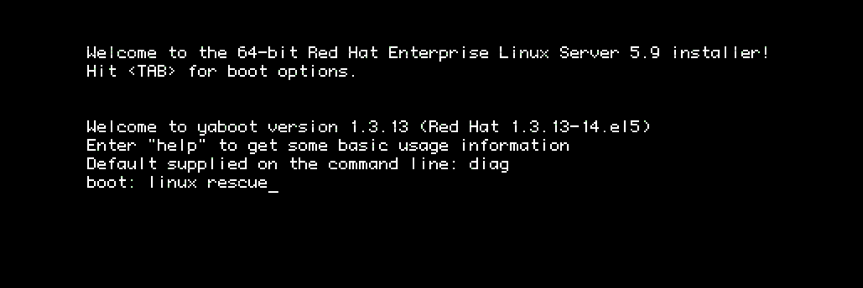
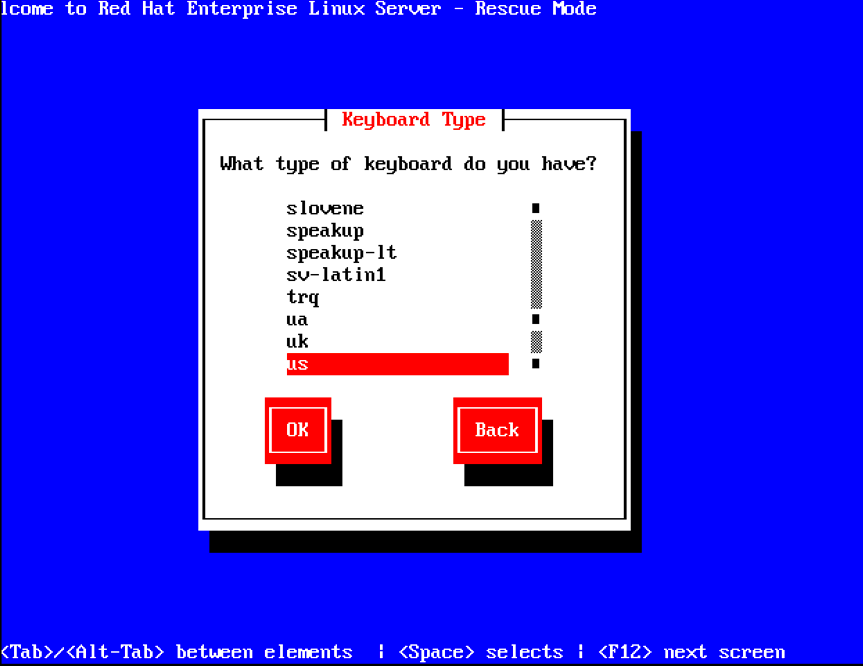
After selecting the correct boot medium, the system enters the "Yaboot" boot interface. After "boot: ", type "linux rescue" to enter the disk image rescue mode. If you see the following error at this point:
Please wait, loading kernel... Elf64 kernel loaded... Loading ramdisk... Claim failed for initrd memory at 02000000 rc=ffffffff ENTER called ok
In the terminal, type setenv real-base 1000000. If after pressing Enter the next command line immediately shows "ok", the parameter has been modified successfully. Continue by typing reset-all in the terminal to reboot, and repeat the above steps until done.
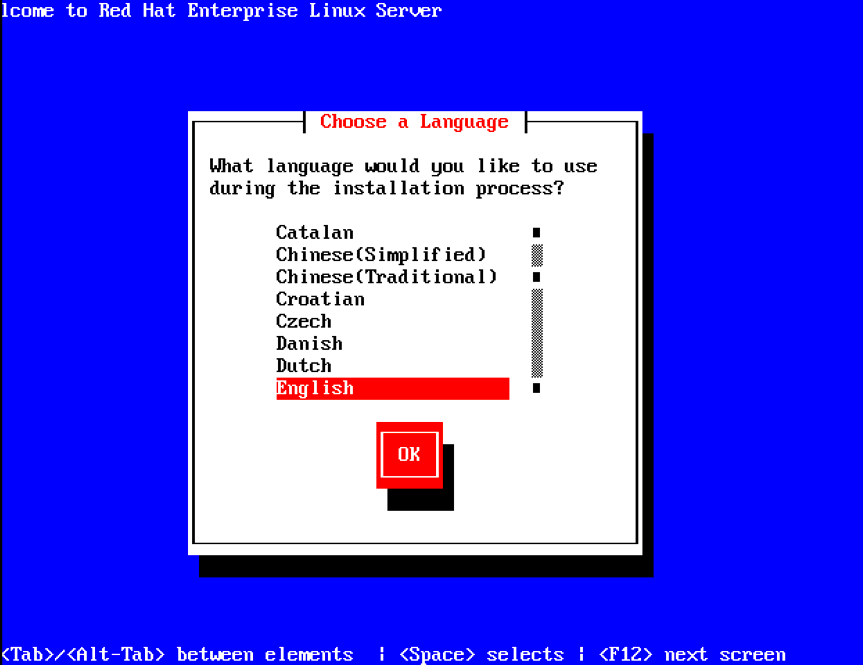
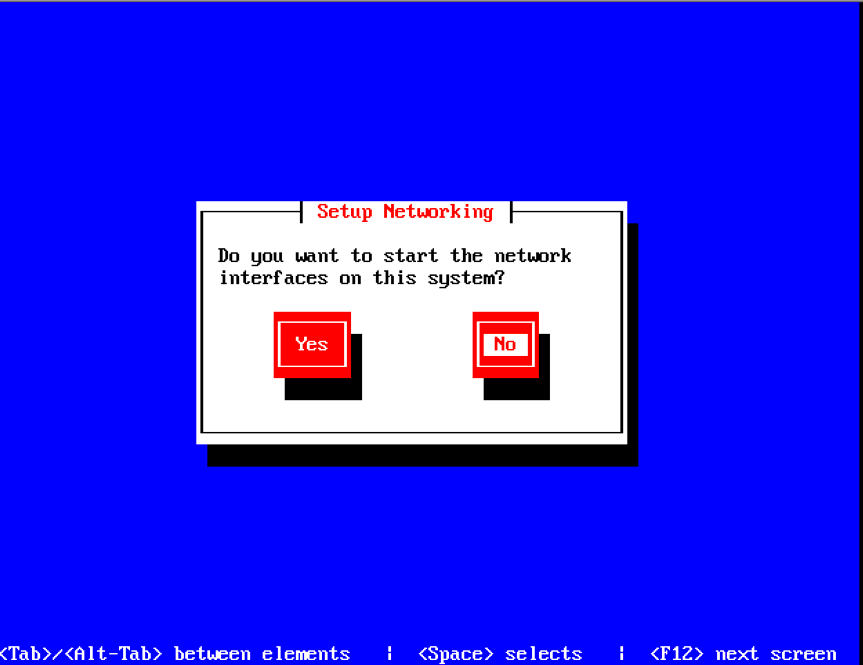
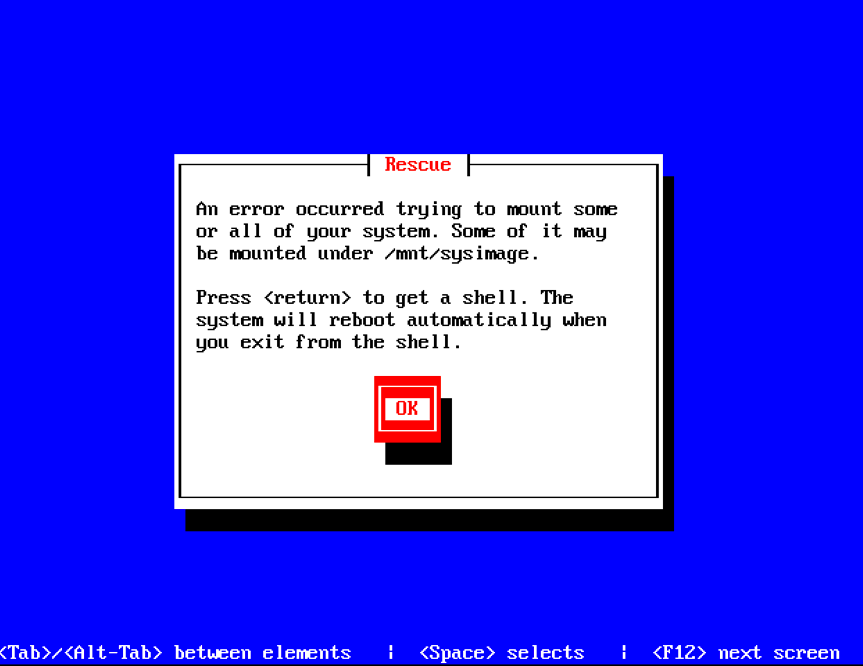
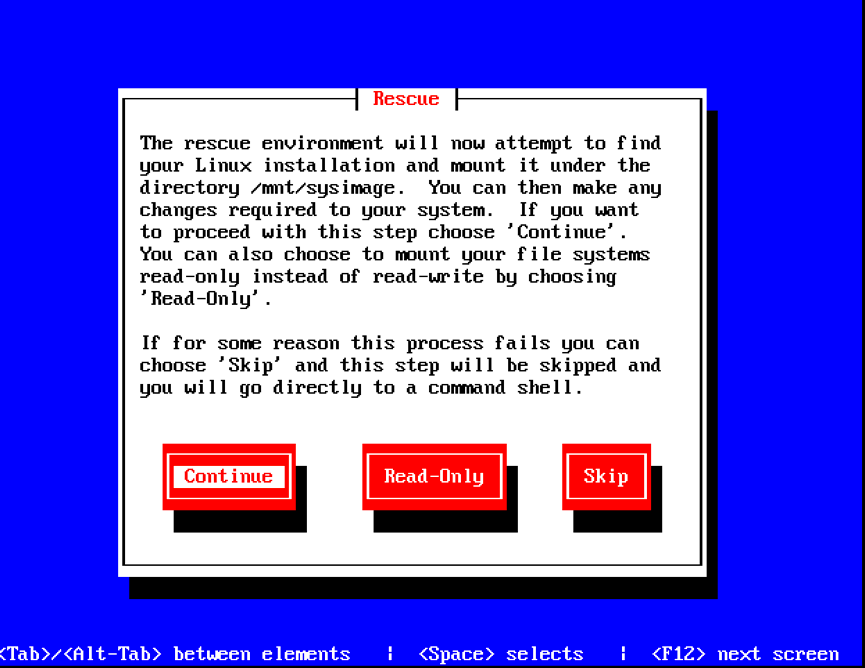
The above screens take quite a while, so please be patient. When asked whether to start network devices, this article selects "No" — selecting "Yes" requires network configuration, which is not covered here. Normally, the rescue mode will scan the LVM from the original system, but will always report an error, indicating that the auto-mount is incomplete and only part of the content is available. Choose "OK" to open a "Shell" — when you exit this shell, the system automatically reboots. Next, the rescue mode prompts to try mounting the original system root partition to "/mnt/sysimage"; choose "continue". Unless you just want to look at the original system's file structure, do not choose "read-only" or "skip".
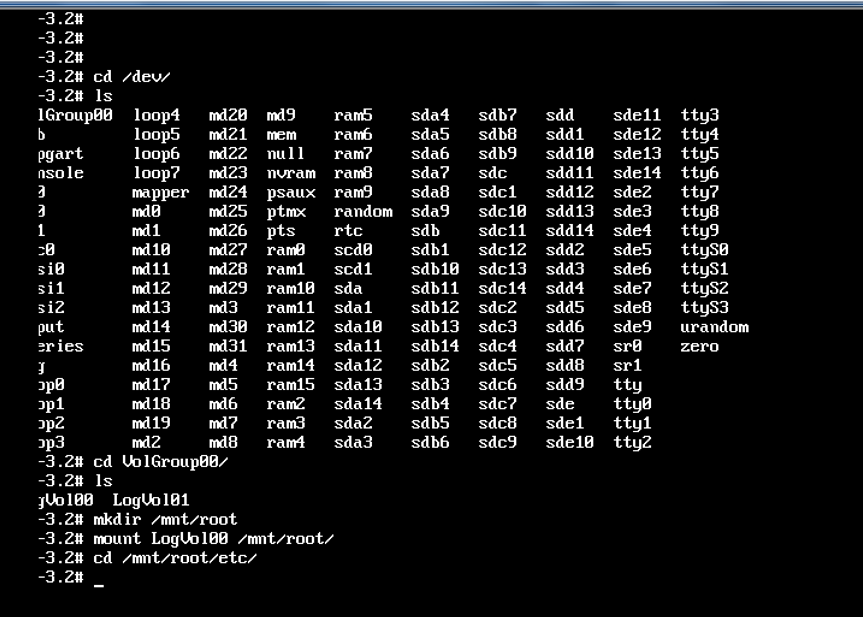
As shown in the figure, a terminal is successfully opened in rescue mode, providing partial functionality of the full system.
2. Modify the file content
As mentioned earlier, this rescue mode only mounts part of the root partition, so create a new directory /mnt/root under /mnt and mount the original root partition there.
Check the files under /dev/mapper (When RedHat Linux Enterprise Edition formats the hard drive during installation, it creates logical volumes, and these devices are stored under /dev/mapper in Linux. If you're using another Linux version that partitions the local hard drive directly, use fdisk -l or fdisk /dev/sd\* to view partition information.) If there's a device like lv0, mount it directly. If not, use pvscan to scan the devices in the original system.


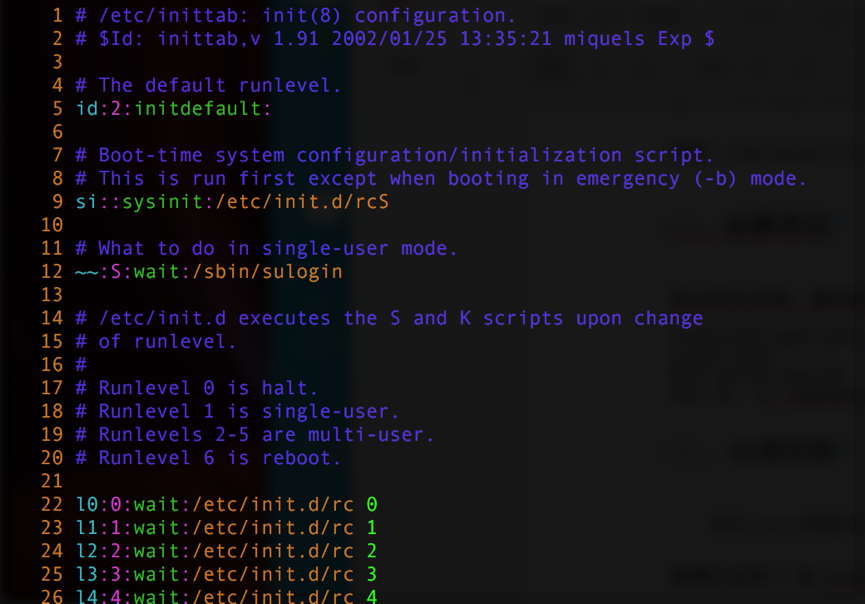
The above image shows the contents of inittab on a Debian Linux system without a graphical interface, for reference.
After modifying the file and restarting, in this case the system did not enter the text interface normally, and still showed "(none) login:". Luckily, the graphical error "INIT: cannot execute '/usr/sbin/gdm'" is temporarily ruled out. Once the system boots normally, it can be handled according to the online solution.
3. Backing up the data
Continuing the previous steps into rescue mode, light up the "Media Tray" button on the front of the blade server, or use the KVM operation bar in the chassis management interface to select the correct blade.
Since Linux does not natively support the NTFS file system, you need to prepare a sufficiently large free hard drive and format it as a Linux-supported format such as Fat32/ext3/ext4. Because USB devices are not automatically mounted in rescue mode, you must first run "fdisk –l" to identify the new drive by its size and other characteristics, then create a mount point "backup" under "/mnt" (mkdir /mnt/backup), and then execute the mount command. If the new drive needs to be formatted with a Linux file system (e.g., ext3), run "mkfs.ext3 /dev/sd*". For Fat32 file systems, mount directly with "mount /dev/sd* /mnt/backup".
Then, happily back up the data. But please note the following:
- When mounting a network image through the IBM chassis management port to enter rescue mode, if the laptop goes to sleep and the network disconnects due to the long duration, the system will appear to hang.
- After the system hangs, the backup operation should have stopped (assumed, not verified). In this hung system, some operations are still possible, but trying to mount a hard drive via USB will definitely not be recognized.
- If the system is working normally, when copying a large number of files in the terminal, should you use "cp", "tar", or "cpio"? This is worth investigating. But one thing is certain: regardless of the command, if executed in the foreground, and the terminal exits (e.g., a remote SSH connection to the host, without modifying related parameters, the terminal will be disconnected due to timeout after a period), the process will also terminate. So when backing up, you might want to add a "&" to run the command in the background, just in case.
4. Repair the System
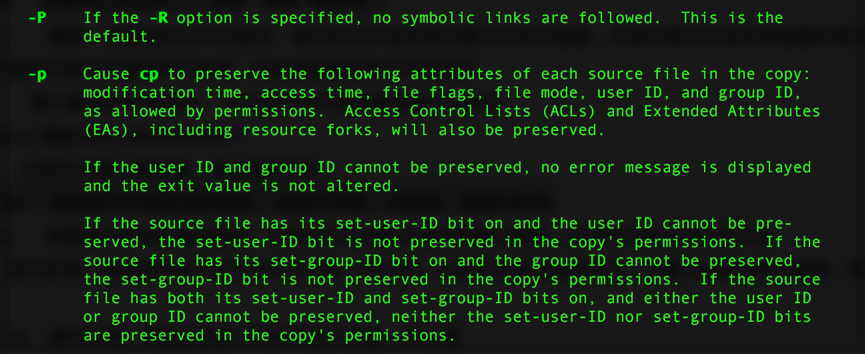
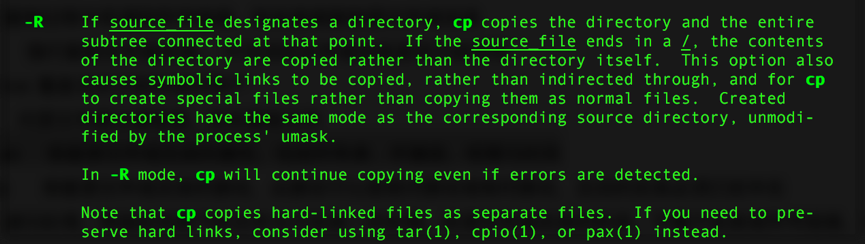
In the case described in this article, during the actual operation, data was not backed up. Instead, the goal of repairing the system was achieved by copying files from another operating system of the same version. After entering rescue mode, when trying to chroot into the original system, running "chroot /mnt/root /bin/bash" reported that there was no "/bin/bash". Upon inspection, the entire "/bin" directory in the original system was missing; the cause is unknown. It happened that other blades in the same blade chassis were identical in both hardware model and system version. Following the Linux philosophy that "everything is a file", the directory was simply copied over and used. Switch the KVM and "Media Tray" to another blade in the same chassis, and insert a Fat32-formatted USB drive. If the blade has no graphical interface, mount the USB drive first, then run "cp –av /bin /media/USB" (replace /media/USB as appropriate for your environment). Regarding the cp command, the "-v" parameter needs no further explanation—it's just verbose mode, displaying detailed information about the command's execution. "-a" is equivalent to "-pPR", meaning it preserves the attributes and hierarchy of the original directory or files and copies symbolic links (special note: if there are hard links in the source files, the cp command will cause these files to lose that property. Therefore, when backing up data earlier, please use tar, cpio, or pax. If the source files you want to copy might be symbolic links but you need the original files, add the "-L" parameter.). 
 Theoretically, this kind of copy is foolproof, but in practice it is not. When performing the above operation, copying symbolic links produced an "Insufficient permission" error. Below is the mapping of all symbolic links under the "/bin" directory.
 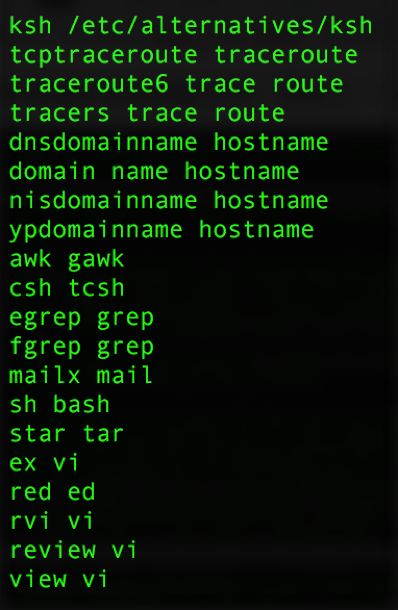 The dumbest way is to type them one by one, which is also the fastest. A relatively less tedious approach is to "write a script", as shown in the figure below. In the script, modify the "SOURCE" and "TARGET" parameters. Running "./get.sh 0" reads the symbolic link information from the "SOURCE" directory; running "./get.sh 1" creates symbolic links in the "TARGET" directory that match those in "SOURCE". In practice, just put the script on the USB drive.
 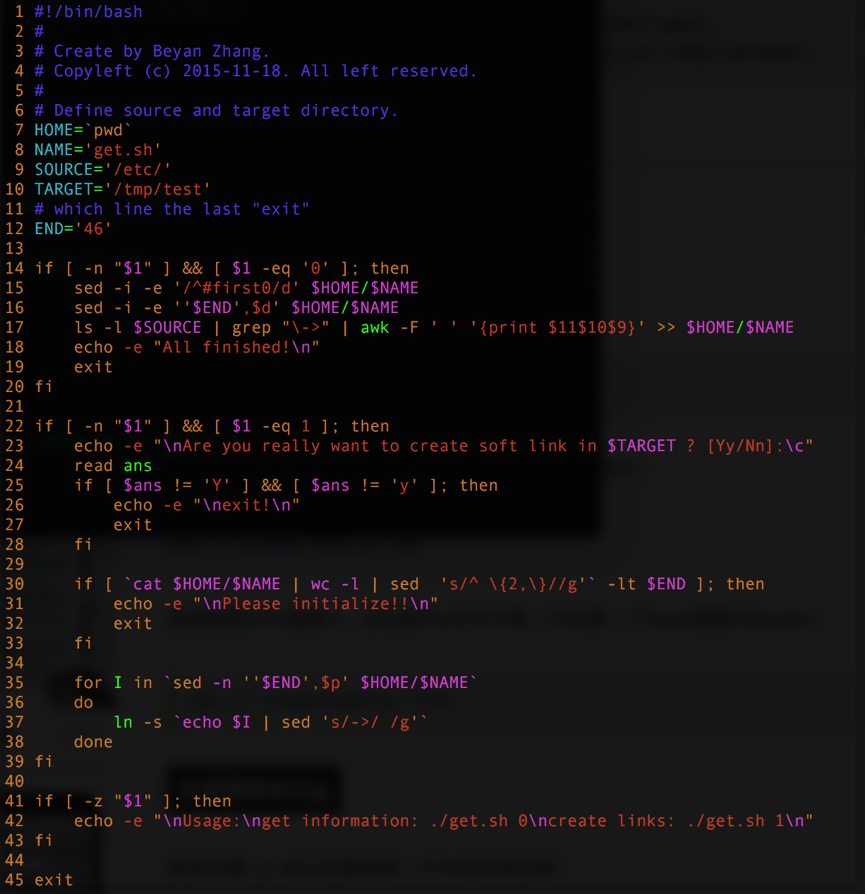 After completing the file repair of the "/bin" directory, first switch the rescue mode system root to the original system, then start any service under "/etc/init.d/" to test whether the original system is complete.
 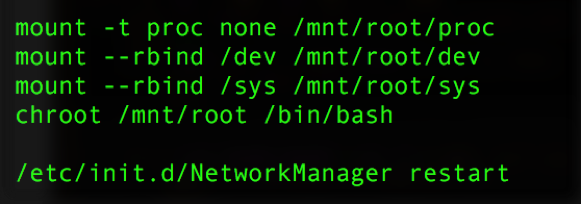 If the above steps are fine, you can reboot and do thorough testing. At this point, the system repair is complete. One final summary: in a Linux system, as long as two files have the same content and permissions, they can be used interchangeably. Generally speaking, "/bin" and "/sbin" contain system-level executables that don't change after the system installation. For "/etc" and "/usr", every time new software is installed, files are added or modified.
评论Comments
加载中…Loading…
留下评论Leave a comment